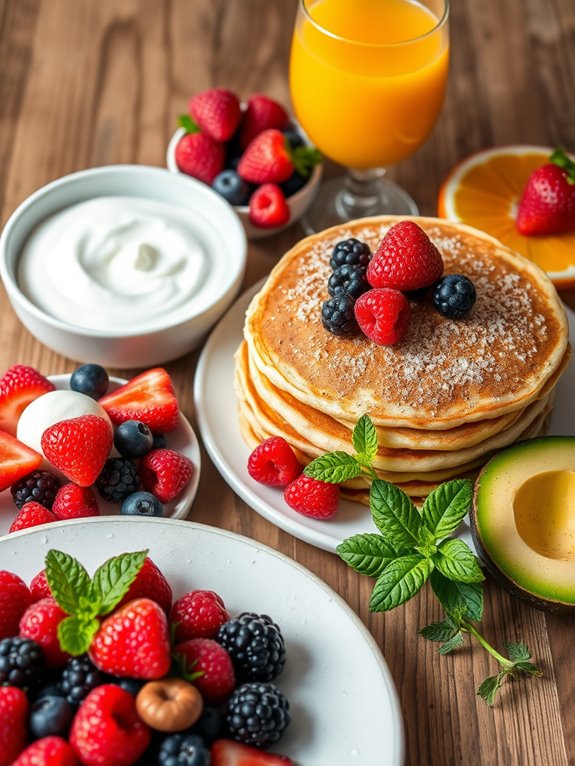
There’s something so delightful about starting the day with a nourishing breakfast that doesn’t spike your sugar levels.
Low-sugar meals can be incredibly satisfying and packed with flavor.
From Greek yogurt parfaits bursting with fresh berries to creamy avocado toast topped with a perfectly poached egg, the options are endless.
These recipes are not only delicious but also gentle on your body, keeping you energized throughout the morning.
Let’s uncover some tasty low-sugar breakfast ideas that will make your mornings brighter!
Greek Yogurt Parfait
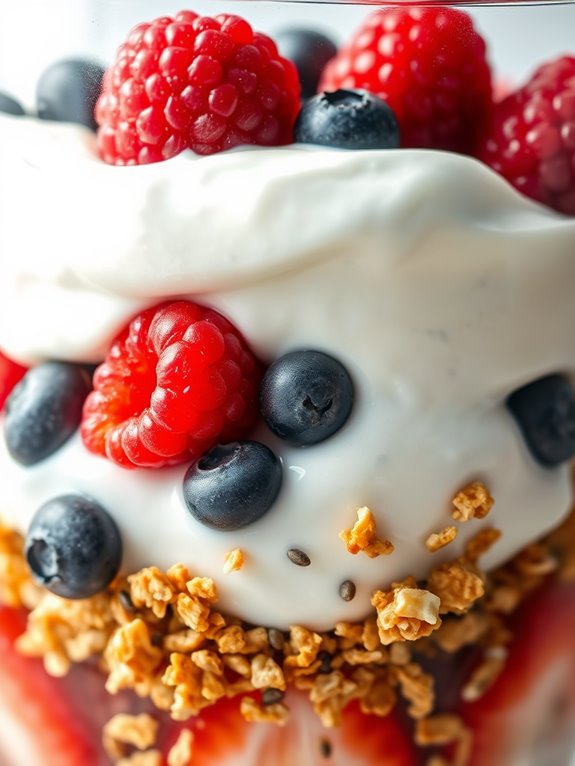
Start your morning off right with a delicious and nutritious Greek Yogurt Parfait. This low-sugar breakfast option is perfect for those who want to maintain a healthy lifestyle without sacrificing flavor. The creamy texture of Greek yogurt pairs wonderfully with the crunchy granola and the natural sweetness of fresh fruits. Not only is this parfait visually appealing, but it’s also rich in protein and essential nutrients that will keep you satisfied throughout the morning.
Preparing a Greek Yogurt Parfait is a delightful experience that allows you to customize the ingredients according to your taste preferences. Whether you enjoy a mix of berries or a tropical twist with mango and pineapple, this versatile dish is sure to please everyone at the breakfast table. Ideal for a serving size of 4-6 people, this parfait can be quickly assembled, making it a perfect choice for busy mornings or a leisurely weekend brunch.
Ingredients for 4-6 servings:
- 3 cups plain Greek yogurt
- 2 cups granola (low-sugar or homemade)
- 1 cup fresh strawberries, sliced
- 1 cup fresh blueberries
- 1 cup fresh raspberries
- 1/2 cup chopped nuts (such as almonds or walnuts)
- 2 tablespoons chia seeds
- Honey (optional, for drizzling)
Cooking Instructions:
- Prepare Ingredients: Wash all the fresh fruits thoroughly. Slice the strawberries into thin pieces. If using homemade granola, prepare it ahead of time according to your preferred recipe.
- Layer the Yogurt: In a medium-sized glass or bowl, add a generous spoonful of Greek yogurt as the base layer. Spread it evenly to cover the bottom.
- Add the Granola: Sprinkle a layer of granola over the yogurt. Confirm the granola is evenly distributed to provide a nice crunch in every bite.
- Arrange the Fruits: Add a layer of sliced strawberries, followed by blueberries and raspberries. Feel free to adjust the fruit quantities to your liking, confirming an even distribution for a balanced flavor.
- Top with Nuts and Chia Seeds: Sprinkle the chopped nuts and chia seeds over the fruit layer. These will add extra texture and nutritional value to the parfait.
- Repeat the Layers: Continue layering the yogurt, granola, and fruits until you reach the top of the glass or bowl. Aim for at least two layers to create an attractive and flavorful parfait.
- Finish with a Drizzle (Optional): If desired, lightly drizzle honey on top for added sweetness. This step is optional and can be skipped if you prefer a low-sugar version.
- Serve Immediately: Serve the parfait immediately to enjoy the delightful contrast of creamy, crunchy, and juicy textures.
Extra Tips:
For the best results, use fresh and ripe fruits that are in season, as they’ll provide the most flavor and natural sweetness. If you prefer a dairy-free option, substitute Greek yogurt with coconut or almond yogurt.
To make your parfait more indulgent, consider adding a layer of unsweetened cocoa powder or a sprinkle of cinnamon. Keep the parfait refrigerated until ready to serve to maintain its freshness and prevent the granola from becoming soggy.
Enjoy customizing your Greek Yogurt Parfait by experimenting with different fruit and nut combinations!
Avocado Toast Delight
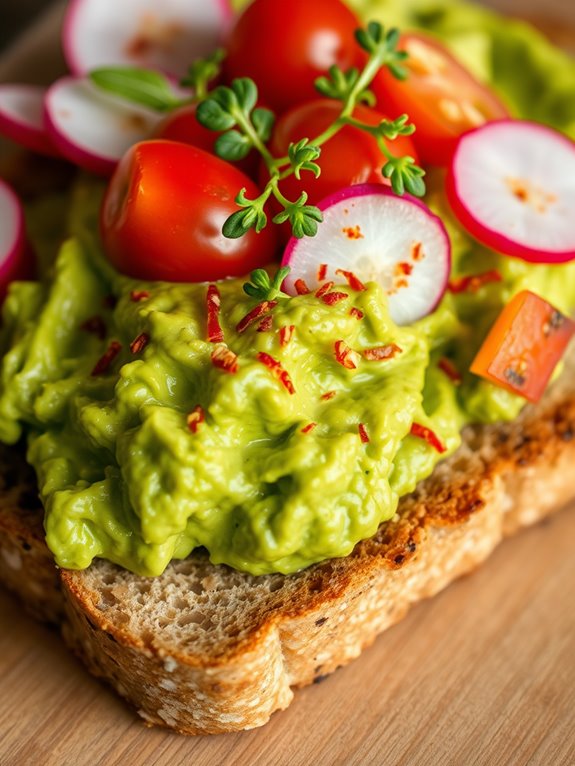
Avocado Toast Delight is a simple yet delicious breakfast option that isn’t only packed with nutrients but also low in sugar. This dish combines the creamy richness of ripe avocados with the tangy flavor of lime and the satisfying crunch of whole grain toast.
It’s a versatile meal that can be customized to individual tastes by adding various toppings, making it an ideal choice for a family breakfast or a brunch with friends. This recipe serves 4-6 people, making it perfect for sharing or meal-prepping for the week.
With its quick preparation time and minimal ingredients, Avocado Toast Delight is an excellent go-to breakfast for busy mornings. Whether you’re looking to start your day with a boost of energy or simply want to enjoy a wholesome meal, this dish is sure to please your taste buds and keep you feeling full and satisfied.
Ingredients (for 4-6 servings):
- 4 ripe avocados
- Juice of 1 lime
- Salt and pepper to taste
- 6 slices of whole grain bread
- 2 tablespoons of olive oil
- Optional toppings: cherry tomatoes, radish slices, red pepper flakes, microgreens
Cooking Instructions:
- Prepare the Avocados: Start by cutting the avocados in half, removing the pits, and scooping the flesh into a bowl. Use a fork to mash the avocado until smooth but still slightly chunky.
- Season the Avocado: Add the lime juice, salt, and pepper to the mashed avocado. Mix well to combine all the flavors. Adjust seasoning to taste.
- Toast the Bread: While the avocado mixture is resting, heat a skillet over medium-high heat. Brush each slice of whole grain bread with olive oil on both sides. Place the bread in the skillet and toast each side until golden brown and crispy, about 2-3 minutes per side.
- Assemble the Toast: Once the bread is toasted, spread a generous amount of the avocado mixture onto each slice. Verify even coverage for a satisfying bite every time.
- Add Toppings: If desired, add any optional toppings such as halved cherry tomatoes, thinly sliced radishes, a sprinkle of red pepper flakes, or a handful of microgreens for added flavor and texture.
- Serve Immediately: Serve the Avocado Toast Delight immediately while the bread is warm and the avocado is fresh.
Extra Tips: For an added protein boost, consider topping your avocado toast with a poached or fried egg. If you prefer a bit of spice, a dash of hot sauce can elevate the flavor profile of this dish.
When selecting avocados, look for those that yield slightly when gently pressed to ascertain ripeness. If you need to store leftover avocado mixture, press plastic wrap directly onto the surface to minimize browning.
Berry Chia Pudding
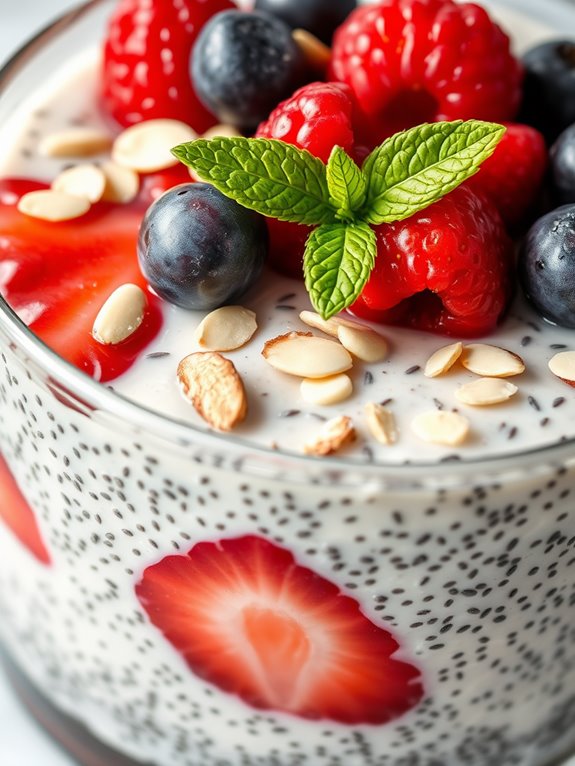
Berry Chia Pudding is a nutritious and delicious breakfast option that’s perfect for those looking to start their day with a boost of energy without the sugar overload. Chia seeds are a powerhouse of nutrients, rich in omega-3 fatty acids, fiber, and protein, making them an excellent choice for a healthy breakfast.
This pudding isn’t only easy to prepare but also incredibly versatile, allowing you to customize it with your favorite berries and toppings. Whether you’re meal prepping for the week or just making a quick breakfast, Berry Chia Pudding is sure to satisfy your taste buds and keep you full until lunchtime.
The magic of chia seeds lies in their ability to absorb liquid and form a gel-like consistency, which is the basis for this creamy pudding. When combined with fresh or frozen berries, a touch of natural sweetener, and your milk of choice, you create a delightful, low-sugar morning treat.
The vibrant colors and flavors of the berries not only make this dish visually appealing but also add a burst of antioxidants and vitamins. Perfect for a serving size of 4-6 people, this recipe can be easily prepared in advance and is an excellent way to guarantee you have a healthy breakfast ready to go during busy mornings.
Ingredients:
- 1 cup chia seeds
- 4 cups unsweetened almond milk (or milk of choice)
- 2 tablespoons maple syrup or honey
- 1 teaspoon vanilla extract
- 2 cups mixed berries (such as strawberries, blueberries, raspberries)
- 1/4 cup sliced almonds or nuts of choice (optional)
- Fresh mint leaves for garnish (optional)
Instructions:
- Prepare the Chia Mixture: In a large mixing bowl, combine the chia seeds, almond milk, maple syrup (or honey), and vanilla extract. Stir well to make sure that the chia seeds are evenly distributed in the liquid.
- Let it Set: Cover the bowl and place it in the refrigerator for at least 4 hours, or overnight. This allows the chia seeds to absorb the liquid and form a pudding-like consistency.
- Prepare the Berries: While the chia pudding is setting, wash and prepare your berries. If desired, slice larger berries like strawberries into smaller pieces.
- Assemble the Pudding: Once the chia pudding has set, give it a good stir to break up any clumps. Divide the pudding evenly into serving bowls or glasses.
- Add the Berries: Top each serving with a generous amount of mixed berries. Feel free to mix and match your favorite combinations to suit your taste.
- Garnish and Serve: For an added crunch, sprinkle sliced almonds or your preferred nuts on top. Garnish with fresh mint leaves for an extra burst of flavor and a pop of color. Serve immediately, or store in the refrigerator for a quick and convenient breakfast option.
Extra Tips:
When preparing Berry Chia Pudding, feel free to experiment with different types of milk to suit your dietary needs, such as coconut milk or oat milk, which can add a unique flavor profile to the dish.
You can also adjust the level of sweetness by varying the amount of maple syrup or honey, or even substituting with a sugar-free alternative if desired. For extra texture, consider adding a layer of granola or a spoonful of nut butter just before serving.
Ultimately, this dish can be made in individual jars for an easy grab-and-go breakfast, perfect for busy mornings.
Veggie Omelette

Start your day with a nutritious and satisfying breakfast by making a Veggie Omelette. This low-sugar healthy breakfast option is packed with protein and fresh vegetables, offering a light yet filling meal that will keep you energized throughout the morning.
The beauty of a veggie omelette is its versatility, allowing you to incorporate your favorite vegetables and cheese, or even add some lean meat if you prefer. It’s a great way to use up leftover veggies and guarantee you’re getting a variety of nutrients at the start of your day.
Perfect for serving 4-6 people, this omelette is ideal for a family breakfast or a weekend brunch with friends. The combination of eggs, colorful vegetables, and a touch of cheese creates a delightful harmony of flavors and textures.
Plus, it’s quick and easy to prepare, making it an excellent choice for busy mornings. By following this simple recipe, you can whip up a delicious and healthy Veggie Omelette in no time.
Ingredients:
- 10 large eggs
- 1/4 cup milk
- 1 teaspoon salt
- 1/2 teaspoon black pepper
- 1 tablespoon olive oil
- 1 cup bell peppers, diced (mixed colors)
- 1 cup mushrooms, sliced
- 1 cup spinach, chopped
- 1/2 cup onion, finely chopped
- 1/2 cup cherry tomatoes, halved
- 1 cup shredded cheese (cheddar or mozzarella)
- 2 tablespoons fresh parsley, chopped (optional)
Cooking Instructions:
1. Prepare the Eggs: In a large bowl, crack the eggs and add milk, salt, and black pepper. Whisk the mixture thoroughly until the eggs are well blended and slightly frothy. The milk will make the omelette light and fluffy.
2. Sauté the Vegetables: Heat olive oil in a large non-stick skillet over medium heat. Add the onions and bell peppers, sautéing for about 3-4 minutes until they start to soften.
Then, add the mushrooms and continue cooking for another 2 minutes. Finally, stir in the spinach and cherry tomatoes, cooking for just a minute until the spinach wilts slightly.
3. Cook the Omelette: Reduce the heat to low and pour the egg mixture evenly over the sautéed vegetables in the skillet. Let it cook undisturbed for about 5-7 minutes, or until the eggs are mostly set but still slightly runny on top.
4. Add the Cheese: Sprinkle the shredded cheese evenly over the omelette. Cover the skillet with a lid and cook for an additional 2-3 minutes, or until the cheese is melted and the eggs are completely set.
5. Serve the Omelette: Carefully slide the omelette onto a serving platter or cut it into sections directly in the skillet. Garnish with freshly chopped parsley if desired. Serve hot and enjoy your delicious Veggie Omelette.
Extra Tips:
For the best results, use a non-stick skillet to prevent the omelette from sticking and guarantee easy flipping or sliding.
Feel free to customize your veggie omelette with other vegetables such as zucchini, asparagus, or broccoli. If you like a bit of heat, add a pinch of red pepper flakes or a few slices of jalapeño.
To make the omelette even more filling, consider adding some cooked turkey bacon or lean ham. Finally, always use fresh eggs for the best flavor and texture.
Overnight Oats
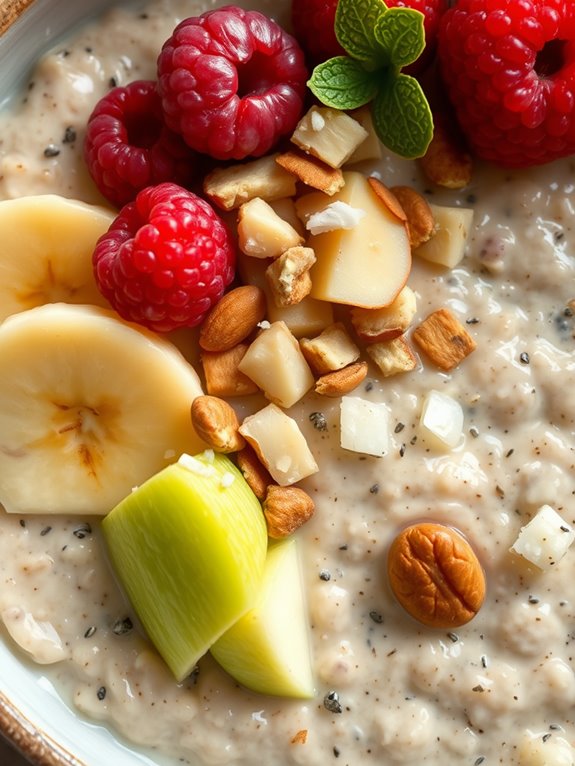
Overnight oats are a convenient and nutritious breakfast option that requires no cooking and can be prepared in advance. This recipe is perfect for those who wish to start their day with a healthy meal that’s low in sugar yet full of flavor. The slow absorption of oats keeps you feeling full and satisfied, making them a great choice for busy mornings.
By preparing these overnight oats the night before, you can enjoy a quick and delicious breakfast that fuels your body with essential nutrients. This particular recipe combines wholesome ingredients like rolled oats, almond milk, and a variety of fresh fruits and nuts to create a balanced breakfast.
The natural sweetness of fruits eliminates the need for added sugars, making it a perfect choice for anyone looking to reduce sugar intake. Customize your oats by adding your favorite fruits or nuts, and enjoy a breakfast that’s both healthy and satisfying.
Ingredients (Serves 4-6):
- 2 cups rolled oats
- 2 1/2 cups unsweetened almond milk
- 1 teaspoon vanilla extract
- 1 teaspoon cinnamon
- 1/4 cup chia seeds
- 1/2 cup Greek yogurt
- 1/4 cup chopped nuts (such as almonds or walnuts)
- 1 cup mixed fresh fruits (such as berries, diced apples, or bananas)
- 2 tablespoons unsweetened shredded coconut (optional)
- 1 tablespoon honey or maple syrup (optional, for added sweetness)
Instructions:
- Combine Ingredients: In a large mixing bowl, combine the rolled oats, almond milk, vanilla extract, and cinnamon. Stir well to guarantee the oats are evenly coated with the milk and spices.
- Add Chia Seeds and Yogurt: Stir in the chia seeds and Greek yogurt. The chia seeds will help thicken the mixture as they absorb the liquid, while the yogurt adds creaminess and a boost of protein.
- Mix in Nuts and Fruits: Add the chopped nuts and mixed fruits to the bowl. Stir gently to distribute them evenly throughout the oat mixture. You can reserve some fruits for topping if desired.
- Refrigerate: Cover the bowl with a lid or plastic wrap and place it in the refrigerator. Allow the oats to soak overnight, or for at least 6-8 hours, so they can absorb the liquid and flavors.
- Serve and Enjoy: In the morning, give the oats a good stir before serving. Divide the overnight oats into individual bowls or jars. Top with the reserved fruits, a sprinkle of shredded coconut, and a drizzle of honey or maple syrup if using.
Extra Tips:
For best results, use old-fashioned rolled oats rather than instant or steel-cut oats, as they achieve the ideal texture when soaked.
Feel free to experiment with different types of milk, such as soy or coconut, to suit your taste preferences or dietary needs. If you prefer a bit of crunch, add nuts or seeds just before serving.
To keep the dish low in sugar, rely on the natural sweetness of fruits and limit the use of honey or syrup. Adjust the consistency of your overnight oats by adding more milk if they seem too thick before serving.
Quinoa Breakfast Bowl
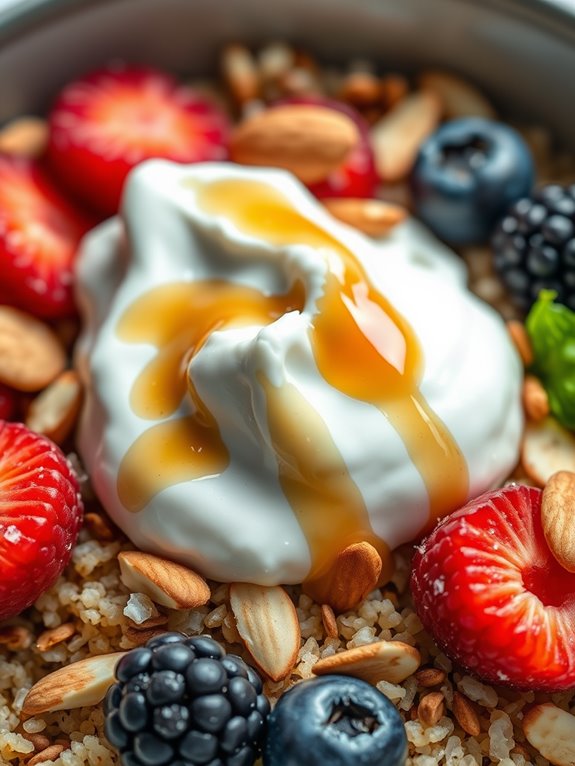
Start your day with a nutritious and delicious Quinoa Breakfast Bowl that isn’t only satisfying but also low in sugar. This wholesome dish combines the health benefits of quinoa, a complete protein that’s packed with essential amino acids, with a delightful assortment of fruits and nuts to add texture and flavor.
Whether you’re looking for a hearty breakfast to fuel a busy morning or a light brunch option, this recipe provides a perfect balance of nutrients to keep you energized throughout the day.
Quinoa Breakfast Bowls are versatile and can be tailored to suit your taste preferences. This recipe serves 4-6 people, making it an ideal choice for family breakfasts or meal prep for the week. With the natural sweetness from fresh fruits and a hint of maple syrup, this breakfast bowl offers a satisfying start without the need for added sugars.
Enjoy the nutty flavor of quinoa complemented by the crunch of almonds and the creaminess of yogurt, all topped off with a sprinkle of cinnamon for an extra kick.
Ingredients (Serving size: 4-6 people):
- 2 cups quinoa
- 4 cups water
- 1/2 teaspoon salt
- 1 cup plain Greek yogurt
- 1/4 cup maple syrup
- 1 teaspoon vanilla extract
- 1/2 teaspoon cinnamon
- 1 cup fresh berries (such as blueberries, strawberries, or raspberries)
- 1 banana, sliced
- 1/4 cup almonds, chopped
- 1/4 cup chia seeds
- 1/4 cup unsweetened shredded coconut
Instructions:
- Rinse the Quinoa: Begin by rinsing 2 cups of quinoa under cold water using a fine-mesh strainer. This helps remove its natural coating, saponin, which can taste bitter.
- Cook the Quinoa: In a medium saucepan, combine the rinsed quinoa with 4 cups of water and 1/2 teaspoon of salt. Bring to a boil over medium-high heat. Once boiling, reduce the heat to low, cover, and let it simmer for about 15 minutes, or until the quinoa is tender and the water is absorbed.
- Fluff and Cool the Quinoa: Once the quinoa is cooked, remove it from the heat and let it sit covered for 5 minutes. Then, fluff it with a fork and allow it to cool slightly.
- Prepare the Yogurt Mixture: In a small bowl, mix 1 cup of plain Greek yogurt with 1/4 cup of maple syrup, 1 teaspoon of vanilla extract, and 1/2 teaspoon of cinnamon. Stir until well combined.
- Assemble the Bowls: Divide the quinoa evenly into 4-6 bowls. Top each with a generous dollop of the yogurt mixture.
- Add Toppings: Arrange the fresh berries, sliced banana, chopped almonds, chia seeds, and shredded coconut over the quinoa and yogurt mix. Feel free to get creative with your presentation!
- Serve and Enjoy: Serve the bowls immediately while the quinoa is still slightly warm, or refrigerate and serve cold if you prefer.
Extra Tips:
For additional flavor, try toasting the almonds and shredded coconut lightly in a dry skillet over medium heat until golden brown before adding them to the bowls.
You can also experiment with different fruits and nuts based on what you have on hand or what’s in season. If you prefer a creamier texture, stir in an extra spoonful of yogurt or a splash of almond milk.
Adjust the sweetness by adding more or less maple syrup according to your taste. Enjoy this versatile breakfast bowl as a healthy way to start your day!
Spinach Frittata

A spinach frittata is a delightful and nutritious breakfast option that combines the rich flavors of fresh spinach with the creamy texture of eggs. This low-sugar dish isn’t only easy to prepare, but it’s also packed with essential vitamins and minerals, making it a perfect start to your day.
The beauty of a frittata lies in its versatility, allowing you to customize it with your preferred vegetables, cheeses, or herbs. For those mornings when you’re in a rush, this spinach frittata can be prepared in advance, refrigerated, and reheated, providing a quick and wholesome meal.
This recipe serves 4-6 people and makes for a hearty breakfast or brunch dish. The ingredients used are simple, yet they come together to create a balanced and flavorful meal that’s sure to please both children and adults alike.
The combination of eggs, spinach, onions, and a hint of cheese creates a delightful harmony of flavors and textures that are sure to satisfy. Not only is this spinach frittata delicious, but it’s also a low-sugar option that fits perfectly into a healthy eating plan.
Ingredients:
- 8 large eggs
- 1/4 cup milk
- Salt and pepper to taste
- 1 tablespoon olive oil
- 1 small onion, finely chopped
- 2 cloves garlic, minced
- 5 ounces fresh spinach, roughly chopped
- 1/2 cup grated Parmesan cheese
- 1/2 teaspoon red pepper flakes (optional)
Instructions:
- Preheat and Prepare: Start by preheating your oven to 350°F (175°C). This will guarantee your oven is at the right temperature when it’s time to bake the frittata.
- Whisk the Eggs: In a large bowl, whisk together the eggs, milk, salt, and pepper. The milk will help to make the frittata fluffy, while the salt and pepper will season the eggs. Set this mixture aside.
- Sauté Onions and Garlic: In a large, oven-safe skillet, heat the olive oil over medium heat. Add the chopped onion and cook until it becomes translucent, about 5 minutes. Stir in the minced garlic and cook for an additional minute until fragrant.
- Add Spinach: Add the chopped spinach to the skillet and stir until it wilts down, which should take about 2-3 minutes. Confirm the spinach is evenly distributed in the pan.
- Combine Ingredients: Pour the egg mixture over the sautéed vegetables in the skillet. Stir gently to combine the ingredients. Sprinkle the grated Parmesan cheese evenly over the top. If you like a little heat, add the red pepper flakes at this stage.
- Cook the Frittata: Allow the frittata to cook on the stovetop over medium-low heat for about 5 minutes, or until the edges start to set. This step helps to create a nice base for the frittata.
- Bake to Finish: Transfer the skillet to the preheated oven and bake for 15-20 minutes, or until the frittata is fully set and a toothpick inserted into the center comes out clean.
- Serve: Once the frittata is done, carefully remove the skillet from the oven. Let it cool slightly before slicing into wedges. Serve warm or at room temperature.
Extra Tips:
When making a spinach frittata, it’s important to use fresh spinach for the best flavor and texture, although frozen spinach can be used in a pinch. Just make sure to thaw and drain it thoroughly to avoid excess moisture.
Additionally, feel free to experiment with other ingredients such as mushrooms, bell peppers, or different cheeses to suit your taste preferences. If you don’t have an oven-safe skillet, you can transfer the sautéed mixture into a baking dish before adding the eggs and baking.
Finally, frittatas can be stored in the refrigerator for up to three days, making them a convenient meal prep option for busy mornings.
Nutty Granola Mix
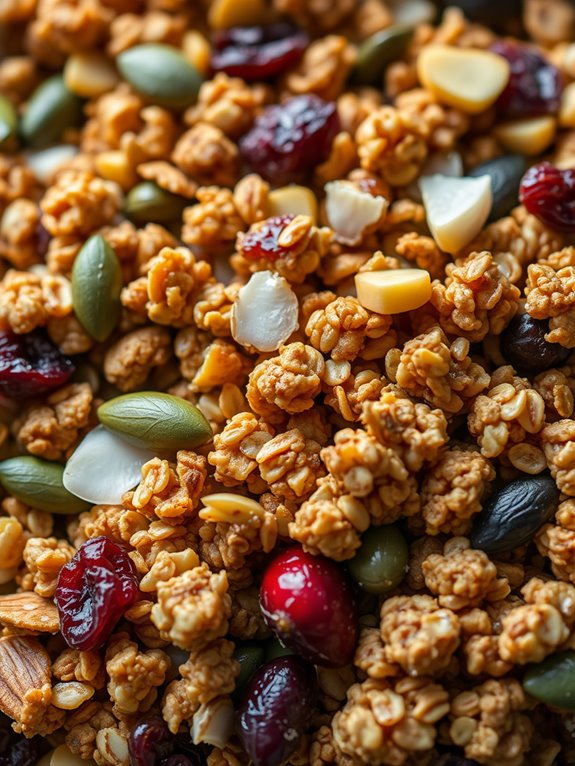
Start your day with a delightful and wholesome Nutty Granola Mix, a perfect choice for those seeking a nutritious, low-sugar breakfast. This homemade granola is filled with the crunch of assorted nuts, the chewiness of dried fruits, and the subtle sweetness of honey or maple syrup. Providing a balance of healthy fats, proteins, and carbohydrates, this granola mix won’t only keep you full longer but also satisfy your taste buds without the overload of refined sugars.
Whether paired with milk, yogurt, or enjoyed on its own, it’s an excellent way to fuel your morning. Crafting this granola at home allows you to control the ingredients, guaranteeing you maintain the low-sugar profile while still delivering a burst of flavors.
It’s versatile enough to adapt to your personal preferences, enabling you to switch up the nuts, seeds, or dried fruits based on what you have on hand. This recipe serves 4-6 people, making it perfect for a family breakfast or for preparing several meals in advance.
Ingredients:
- 3 cups rolled oats
- 1 cup almonds, chopped
- 1 cup walnuts, chopped
- 1/2 cup pumpkin seeds
- 1/2 cup sunflower seeds
- 1/2 cup unsweetened coconut flakes
- 1/3 cup honey or maple syrup
- 1/4 cup coconut oil, melted
- 1 teaspoon vanilla extract
- 1 teaspoon ground cinnamon
- 1/2 cup dried cranberries or raisins
Cooking Instructions:
- Preheat the Oven: Begin by preheating your oven to 300°F (150°C). This moderate temperature guarantees that the granola bakes evenly without burning.
- Mix Dry Ingredients: In a large mixing bowl, combine the rolled oats, chopped almonds, chopped walnuts, pumpkin seeds, sunflower seeds, and unsweetened coconut flakes. Stir well to guarantee a good mix of all the dry ingredients.
- Prepare the Wet Mixture: In a smaller bowl, whisk together the honey or maple syrup, melted coconut oil, vanilla extract, and ground cinnamon until well combined. This mixture will bind the granola and add natural sweetness.
- Combine Mixtures: Pour the wet mixture over the dry ingredients, using a spatula or wooden spoon to thoroughly coat the oats and nuts. Guarantee that all components are evenly moistened.
- Spread on Baking Sheet: Line a large baking sheet with parchment paper. Spread the granola mixture evenly across the sheet, pressing down lightly with the back of the spoon to create a uniform layer.
- Bake the Granola: Place the baking sheet in the preheated oven and bake for 25-30 minutes, stirring halfway through the baking time to guarantee even toasting. The granola should turn golden brown and fragrant.
- Add Dried Fruit: Once baked, remove the granola from the oven and immediately stir in the dried cranberries or raisins while it’s still warm. The heat will slightly soften the fruit, integrating it into the mix.
- Cool and Store: Allow the granola to cool completely on the baking sheet. Once cooled, transfer it to an airtight container for storage. This will keep it fresh and crunchy.
Extra Tips:
For a more clumpy granola, press the mixture firmly on the baking sheet before baking and avoid stirring it too much while it’s in the oven. You can customize this recipe to your taste by adding different nuts or seeds, such as pecans or chia seeds.
If you prefer a touch more sweetness, you can drizzle a little extra honey or syrup over the top before baking. Remember to store your granola in a cool, dry place to maintain its crunchiness for up to two weeks. Enjoy experimenting with this versatile and healthy breakfast option!
Cottage Cheese Snack
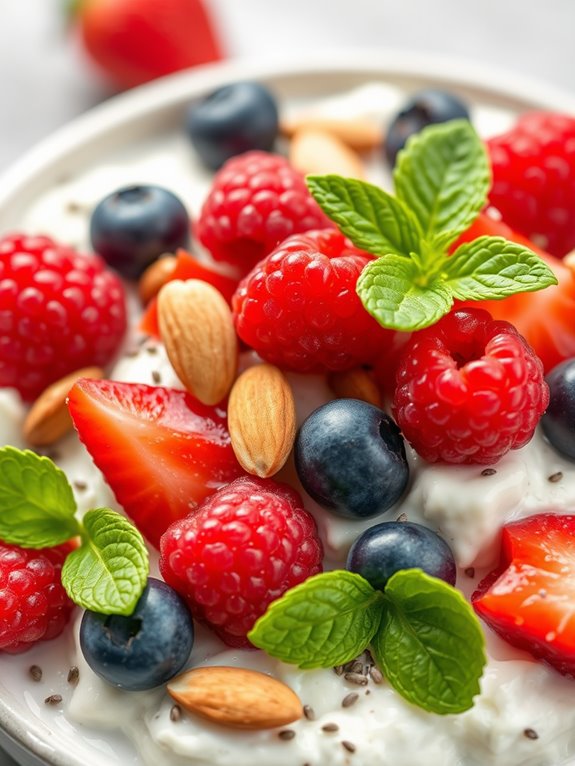
Starting your day with a healthy breakfast can set a positive tone for the rest of your day. This low-sugar Cottage Cheese Snack is a perfect way to satisfy your morning hunger with a delightful combination of creaminess and crunch. Packed with protein from cottage cheese and loaded with a variety of fruits and nuts, this snack is both nourishing and fulfilling.
It provides a balanced blend of nutrients that will keep you energized and focused, whether you’re heading to work or gearing up for a workout. The Cottage Cheese Snack is an ideal choice for those looking to maintain a healthy lifestyle without compromising on taste.
It’s quick to prepare, making it a practical option for busy mornings. Furthermore, this recipe can be easily customized according to your taste preferences and the seasonal availability of fruits. With just a few ingredients, you can create a vibrant and substantial breakfast that caters to the whole family, serving 4 to 6 people.
Ingredients:
- 3 cups cottage cheese (low-fat or full-fat, according to preference)
- 1 cup mixed berries (such as strawberries, blueberries, and raspberries)
- 1/2 cup sliced almonds
- 2 tablespoons chia seeds
- 2 tablespoons honey or maple syrup (optional)
- 1 teaspoon vanilla extract
- Fresh mint leaves (for garnish, optional)
Instructions:
- Prepare the Base: In a large mixing bowl, add the cottage cheese. Stir it gently with a spoon to guarantee it’s smooth and creamy. If you prefer a sweeter taste, mix in the honey or maple syrup and vanilla extract until well combined.
- Add the Fruits: Gently wash the berries and pat them dry with a paper towel. Add the mixed berries into the bowl with the cottage cheese and mix them gently to distribute them evenly throughout the cottage cheese.
- Incorporate the Crunch: Sprinkle the sliced almonds and chia seeds over the cottage cheese and fruit mixture. Stir them in gently to guarantee every serving will have a bit of crunch.
- Chill (Optional): If you have time, cover the bowl and place it in the refrigerator for about 10-15 minutes. This will allow the flavors to meld together and the chia seeds to absorb some moisture, creating a slightly thicker texture.
- Serve: Once ready to serve, scoop the cottage cheese mixture into individual bowls. Garnish each serving with a few fresh mint leaves for added freshness and visual appeal.
Extra Tips:
To elevate this Cottage Cheese Snack, consider experimenting with different toppings. You could add a sprinkle of cinnamon or a dash of nutmeg for a warm spice flavor.
For a tropical twist, try incorporating pineapple chunks or mango slices. Remember, the type of berries and nuts can be swapped according to your taste and what you have on hand. This recipe is a versatile canvas for your creativity, allowing you to tailor it to your dietary needs and preferences.
Enjoy this snack cold for the best revitalizing experience, especially during warmer months.
Almond Flour Pancakes

Almond Flour Pancakes are a delicious and healthy alternative to traditional pancakes, perfect for those who are looking to cut down on sugar without sacrificing flavor. Made with almond flour, these pancakes are naturally gluten-free and packed with nutrients like protein and healthy fats. Their light and fluffy texture, combined with a hint of sweetness from natural sweeteners, make them a delightful breakfast option for anyone looking to start their day on a healthy note.
In addition to being low in sugar, Almond Flour Pancakes are incredibly versatile. You can customize them with your favorite toppings, such as fresh berries, nuts, or a dollop of Greek yogurt. Whether you’re serving them to family or enjoying them solo, these pancakes are sure to be a hit. This recipe will yield enough pancakes to serve 4-6 people, making it perfect for a family breakfast or brunch gathering.
Ingredients:
- 2 cups almond flour
- 1 teaspoon baking powder
- 1/4 teaspoon salt
- 3 large eggs
- 1/4 cup almond milk (or milk of choice)
- 2 tablespoons maple syrup or honey
- 1 teaspoon vanilla extract
- 2 tablespoons coconut oil or butter (for cooking)
Cooking Instructions:
- Prepare the Dry Ingredients: In a large mixing bowl, combine the almond flour, baking powder, and salt. Whisk them together until well blended to guarantee even distribution of the baking powder throughout the flour.
- Mix the Wet Ingredients: In a separate bowl, whisk together the eggs, almond milk, maple syrup (or honey), and vanilla extract. Beat the mixture until it becomes smooth and well combined.
- Combine Wet and Dry Ingredients: Gradually pour the wet ingredients into the bowl with the dry ingredients. Stir gently with a spatula or whisk until you achieve a smooth batter. Be careful not to overmix, as this can make the pancakes dense.
- Heat the Cooking Surface: Place a non-stick skillet or griddle over medium heat and add a tablespoon of coconut oil or butter. Allow it to melt and coat the surface evenly.
- Cook the Pancakes: Using a 1/4 cup measure, pour batter onto the heated skillet for each pancake. Cook for about 2-3 minutes, or until bubbles form on the surface and the edges begin to set. Flip the pancakes gently and cook for another 2-3 minutes until golden brown and cooked through.
- Serve: Once cooked, transfer the pancakes to a serving plate. Repeat the cooking process with the remaining batter, adding more oil or butter as needed. Serve warm with your choice of toppings.
Extra Tips: To guarantee the best results, make sure your almond flour is fresh and finely ground, as coarser flour can affect the texture of the pancakes. If the batter feels too thick, you can adjust the consistency by adding a little more almond milk.
When cooking, keep an eye on the heat to prevent the pancakes from browning too quickly on the outside while remaining undercooked inside. If needed, adjust the heat between medium and low to achieve evenly cooked pancakes. Enjoy your pancakes with a topping of fresh fruit, nuts, or a drizzle of honey for an added touch of sweetness.
Savory Breakfast Muffins
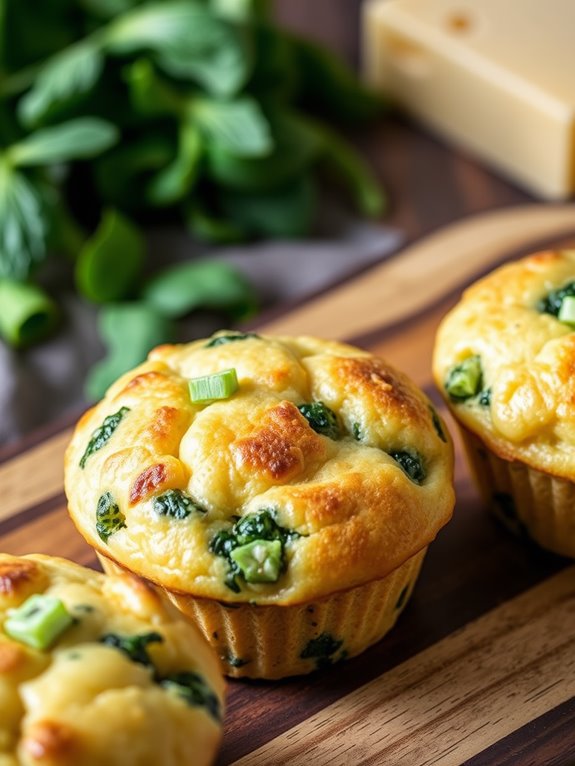
Start your day with a burst of flavor by indulging in these Savory Breakfast Muffins. These muffins are an excellent way to enjoy a nutritious breakfast on the go, combining the goodness of vegetables, cheese, and eggs into a convenient, handheld meal.
They’re low in sugar, making them a perfect choice for those looking to cut back on sweet breakfast options without sacrificing taste or satisfaction.
These muffins aren’t only delicious but also versatile, allowing you to customize with your favorite ingredients to suit your taste. Whether you’re serving a family breakfast or preparing meals for the week ahead, these Savory Breakfast Muffins are sure to please everyone at the table.
Packed with protein, fiber, and essential nutrients, they’re an ideal choice for a healthy and balanced start to your day.
Ingredients (for 4-6 servings):
- 1 cup whole wheat flour
- 1 teaspoon baking powder
- 1/2 teaspoon baking soda
- 1/2 teaspoon salt
- 1/4 teaspoon black pepper
- 1/2 cup grated cheddar cheese
- 1/4 cup chopped green onions
- 1/2 cup chopped spinach
- 4 large eggs
- 1/2 cup milk
- 1/4 cup olive oil
- 1 teaspoon Dijon mustard
Cooking Instructions:
- Preheat the Oven: Begin by preheating your oven to 375°F (190°C). This guarantees that the muffins bake evenly and achieve the perfect texture.
- Prepare the Muffin Tin: Line a 12-cup muffin tin with paper liners or lightly grease the cups with cooking spray. This will make it easier to remove the muffins once they’re baked.
- Mix Dry Ingredients: In a large mixing bowl, combine the whole wheat flour, baking powder, baking soda, salt, and black pepper. Whisk these dry ingredients together to guarantee they’re evenly distributed.
- Add Cheese and Vegetables: Stir in the grated cheddar cheese, chopped green onions, and chopped spinach into the dry ingredients. Toss until the cheese and vegetables are well coated with the flour mixture.
- Beat the Eggs: In a separate bowl, beat the eggs lightly. Add the milk, olive oil, and Dijon mustard, and whisk until well combined.
- Combine Wet and Dry Ingredients: Pour the wet ingredients into the bowl with the dry ingredients. Stir gently with a spatula or wooden spoon until just combined. Be careful not to overmix, as this can make the muffins tough.
- Fill the Muffin Cups: Divide the batter evenly among the prepared muffin cups. Fill each cup about three-quarters full to allow room for the muffins to rise.
- Bake the Muffins: Place the muffin tin in the preheated oven and bake for 18-20 minutes or until a toothpick inserted into the center of a muffin comes out clean.
- Cool and Serve: Allow the muffins to cool in the tin for about 5 minutes before transferring them to a wire rack to cool completely. Serve warm or at room temperature.
Extra Tips:
To enhance the flavor, consider adding a pinch of your favorite herbs, such as thyme or oregano, to the batter.
If you prefer a spicier kick, you can also include a dash of red pepper flakes.
These muffins freeze well, so feel free to make a double batch and store the extras for busy mornings. Simply reheat in the microwave or oven when you’re ready to enjoy them.
Be sure to experiment with different vegetables and cheeses to find the perfect combination for your taste!
Smoked Salmon Wrap
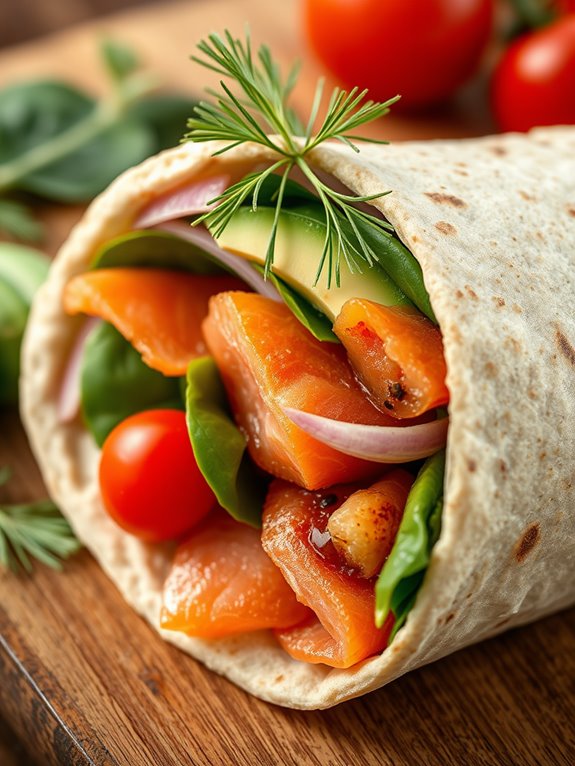
Start your day with a nutritious and delicious Smoked Salmon Wrap that’s both low in sugar and high in flavor. Perfect for breakfast or brunch, this wrap combines the rich taste of smoked salmon with the freshness of vegetables, all wrapped up in a whole-grain tortilla.
This dish isn’t only quick and easy to prepare, but it’s also packed with essential vitamins and minerals to keep you energized throughout the morning. Ideal for a family breakfast or a small gathering, this recipe serves 4-6 people and offers a delightful combination of textures and flavors.
The creaminess of avocado, the crunch of fresh greens, and the savory touch of smoked salmon come together beautifully in each bite. Whether you’re a fan of traditional breakfast foods or seeking something a little different, this Smoked Salmon Wrap is sure to become a household favorite.
Ingredients (Serves 4-6)
- 6 whole-grain tortillas
- 12 ounces of smoked salmon, thinly sliced
- 1 large avocado, sliced
- 1 cup of baby spinach leaves
- 1/2 cup of thinly sliced red onion
- 1/2 cup of cherry tomatoes, halved
- 1/4 cup of cream cheese
- 2 tablespoons of fresh dill, chopped
- 1 tablespoon of lemon juice
- Salt and pepper to taste
Cooking Instructions
- Prepare the Cream Cheese Spread: In a small bowl, combine the cream cheese, chopped fresh dill, and lemon juice. Mix well until the ingredients are fully incorporated. Season with a pinch of salt and pepper to taste. This will serve as a flavorful base spread for the wrap.
- Lay Out the Tortillas: Spread each whole-grain tortilla on a flat surface. Using a butter knife or a spatula, evenly spread about one tablespoon of the cream cheese mixture onto each tortilla, guaranteeing a thin, even layer across the entire surface.
- Layer the Ingredients: On top of the cream cheese, place a handful of baby spinach leaves, followed by a few slices of avocado, a few pieces of red onion, and a couple of cherry tomato halves. Distribute the smoked salmon slices evenly among the tortillas, making sure each wrap has an equal amount.
- Roll the Wraps: Carefully roll each tortilla tightly into a wrap, starting from one end and rolling toward the other to confirm all ingredients are enclosed. As you roll, gently press down to keep the wrap firm and prevent it from unraveling.
- Slice and Serve: Once all the wraps are assembled, use a sharp knife to slice each wrap in half diagonally. Arrange the wraps on a serving platter and garnish with a sprinkle of fresh dill for an extra touch of flavor. Serve immediately or refrigerate for up to an hour before serving.
Extra Tips
For a creamier texture, consider mashing the avocado and mixing it with a bit of lemon juice before adding it to the wrap. This prevents browning and enhances the overall flavor.
If you prefer a touch of heat, add a light sprinkle of red pepper flakes to the cream cheese mixture. Additionally, these wraps can be made a day in advance; simply wrap them tightly in plastic wrap and store them in the refrigerator. This makes them a convenient option for busy mornings or when hosting brunch.
Coconut Flour Waffles

Coconut Flour Waffles are a delightful low-sugar breakfast option that combines the nutty flavor of coconut with the light, crispy texture of traditional waffles. These waffles aren’t only delicious but also gluten-free and packed with healthy fats and fiber. They make for a perfect breakfast treat that can be topped with your favorite fruits, nuts, or a drizzle of sugar-free syrup.
Whether you’re following a low-carb diet or simply looking to enjoy a healthier breakfast, these waffles are guaranteed to satisfy your morning cravings.
Made with coconut flour, these waffles have a unique texture and a subtle sweetness that pairs well with various toppings. Coconut flour is a great alternative to traditional wheat flour, offering a lower carbohydrate content while being rich in fiber and protein. This recipe yields waffles that are fluffy on the inside and crispy on the outside, making them a delicious way to start your day. Plus, they’re super easy to whip up, so you’ll have a tasty breakfast ready in no time.
Ingredients (Serves 4-6):
- 1 cup coconut flour
- 1 teaspoon baking powder
- 1/4 teaspoon salt
- 6 large eggs
- 1/2 cup coconut milk
- 1/4 cup melted coconut oil
- 2 tablespoons honey or maple syrup (optional for sweetness)
- 1 teaspoon vanilla extract
Instructions:
- Preheat the Waffle Maker: Start by preheating your waffle maker according to the manufacturer’s instructions. This guarantees that your waffles cook evenly and achieve the perfect crispy texture.
- Mix Dry Ingredients: In a large mixing bowl, combine the coconut flour, baking powder, and salt. Whisk them together until they’re thoroughly mixed and there are no lumps.
- Combine Wet Ingredients: In a separate bowl, beat the eggs until they’re fluffy. Add in the coconut milk, melted coconut oil, honey or maple syrup (if using), and vanilla extract. Mix well until all the wet ingredients are fully incorporated.
- Combine Wet and Dry Ingredients: Gradually add the wet ingredients to the dry ingredients. Stir the mixture until you have a smooth batter. The batter will be thick due to the coconut flour’s high absorbency.
- Cook the Waffles: Lightly grease the waffle maker with a bit of coconut oil to prevent sticking. Pour an appropriate amount of batter into the center of the waffle maker, spreading it evenly. Close the lid and cook the waffles for about 4-6 minutes, or until they’re golden brown and crispy.
- Serve: Carefully remove the waffles from the waffle maker and place them on a serving plate. Repeat the process with the remaining batter. Serve hot with your choice of toppings.
Extra Tips:
- If you find the batter too thick, add a little more coconut milk to reach your desired consistency. Coconut flour absorbs more liquid than regular flour, so slight adjustments might be necessary.
- Feel free to experiment with different flavors by adding spices such as cinnamon or nutmeg to the batter.
- To keep the waffles warm while you finish cooking the rest, place them on a baking sheet in an oven set to a low temperature (around 200°F).
- These waffles can be stored in the refrigerator for up to three days or frozen for longer storage. Simply reheat them in a toaster or oven before serving.
Tofu Scramble

Tofu scramble is a delightful and nutritious breakfast option that serves as a fantastic alternative to traditional scrambled eggs. It’s packed with protein and rich in flavors, making it a perfect start to your day. This dish isn’t only vegan-friendly but also low in sugar, guaranteeing you enjoy a healthy breakfast without sacrificing taste.
Tofu scramble can be customized with your favorite vegetables and spices, allowing you to create a dish that suits your palate while providing plenty of nutrients. The key to a delicious tofu scramble lies in the texture and seasoning. Tofu acts as a wonderful canvas, absorbing the flavors of the spices and herbs you choose.
Whether you prefer it spicy, savory, or with a hint of sweetness, you can easily adjust the ingredients to create your ideal breakfast. In this recipe, we’ll guide you through creating a tofu scramble that serves 4-6 people, perfect for a family breakfast or meal prep for the week.
Ingredients (Serves 4-6):
- 1 block (14 oz) of firm tofu
- 2 tablespoons olive oil
- 1 small onion, finely chopped
- 1 red bell pepper, diced
- 1 cup spinach, chopped
- 1 teaspoon turmeric powder
- 1 teaspoon cumin powder
- 1 teaspoon garlic powder
- Salt, to taste
- Black pepper, to taste
- 2 tablespoons nutritional yeast
- 1 tablespoon soy sauce or tamari (optional)
- Fresh herbs like parsley or cilantro, chopped (for garnish)
Cooking Instructions:
- Prepare the Tofu: Drain and press the tofu to remove excess moisture. Crumble the tofu into small pieces using your hands or a fork, mimicking the texture of scrambled eggs.
- Sauté Vegetables: In a large skillet, heat the olive oil over medium heat. Add the chopped onion and diced red bell pepper. Sauté for about 5 minutes or until the vegetables are softened and the onion is translucent.
- Add Spices: Sprinkle the turmeric, cumin, and garlic powder over the sautéed vegetables. Stir well to combine and let the spices cook for about 1 minute, allowing their flavors to meld.
- Cook the Tofu: Add the crumbled tofu to the skillet. Stir the mixture well to guarantee the tofu is evenly coated with the spices and vegetables. Cook for about 5-7 minutes, stirring occasionally.
- Season the Scramble: Stir in the nutritional yeast and soy sauce (if using). Add salt and black pepper to taste. Continue to cook for another 2-3 minutes, allowing the flavors to develop.
- Add Spinach: Fold in the chopped spinach and cook just until wilted, about 2 minutes. Remove the skillet from heat.
- Garnish and Serve: Sprinkle fresh herbs over the tofu scramble for added freshness and flavor. Serve hot as is or with whole-grain toast or avocado slices.
Extra Tips:
To enhance the flavor of your tofu scramble, try experimenting with different vegetable combinations such as mushrooms, zucchini, or tomatoes. For a creamier texture, consider adding a splash of unsweetened plant-based milk during cooking.
Additionally, if you prefer a cheesy taste, increase the amount of nutritional yeast. Always taste and adjust the seasoning before serving to suit your preference. Tofu scramble is also excellent as a filling for breakfast burritos or as a topping for whole-grain toast. Enjoy your healthy, delicious, and low-sugar breakfast!
Banana Nut Smoothie
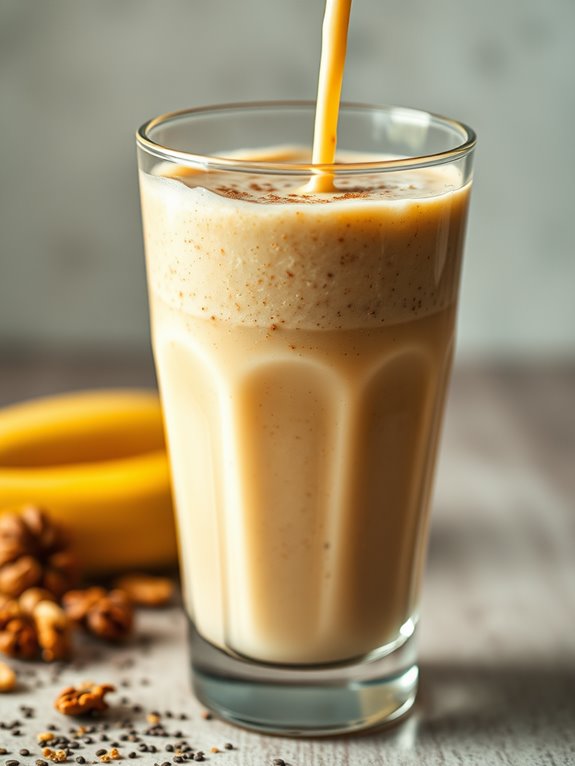
Start your day with a burst of energy and nutrition by indulging in a Banana Nut Smoothie. This delightful concoction isn’t only packed with flavors but also rich in essential nutrients that are perfect for a morning boost. With the natural sweetness of ripe bananas and the wholesome crunch of nuts, this smoothie is a fantastic way to enjoy a low-sugar breakfast that keeps you full and satisfied.
Whether you’re rushing out the door or enjoying a leisurely morning, this Banana Nut Smoothie is a quick and easy option that doesn’t compromise on taste or health benefits.
Bananas are known for their high potassium content, aiding in heart health and maintaining proper muscle function. Combined with the healthy fats and proteins from nuts, this smoothie becomes a balanced meal in a glass. It’s also a great option for those looking to reduce sugar intake, as it relies on the natural sweetness of bananas and a hint of vanilla to create a delectable flavor profile.
Perfect for 4-6 servings, this recipe is versatile enough to be enjoyed on its own or paired with other breakfast favorites.
Ingredients for 4-6 servings:
- 4 ripe bananas
- 1 cup unsweetened almond milk
- 1/2 cup plain Greek yogurt
- 1/4 cup almond butter
- 1/4 cup chopped walnuts
- 1 tablespoon chia seeds
- 1 teaspoon vanilla extract
- 1/2 teaspoon ground cinnamon
- Ice cubes (optional)
Cooking Instructions:
- Prepare the Ingredients: Start by peeling the bananas and breaking them into smaller pieces. This will make it easier for them to blend smoothly. Measure out all other ingredients to guarantee a quick and streamlined blending process.
- Blend the Base: In a high-speed blender, combine the ripe bananas, unsweetened almond milk, and plain Greek yogurt. Blend on medium speed until you achieve a smooth and creamy consistency. This forms the base of your smoothie.
- Add Flavor and Texture: To the banana base, add almond butter, chopped walnuts, chia seeds, vanilla extract, and ground cinnamon. Blend again on high speed for another 1-2 minutes until all ingredients are thoroughly combined and the mixture is uniform.
- Adjust Consistency: If you prefer a thicker smoothie, add ice cubes and blend until they’re crushed and the smoothie is chilled. For a thinner consistency, you can add a little more almond milk and blend again.
- Serve and Enjoy: Pour the smoothie into glasses and serve immediately. You can garnish with additional chopped walnuts or a sprinkle of cinnamon for an extra touch of flavor and presentation.
Extra Tips:
For an even richer taste, you can toast the walnuts before adding them to the smoothie. Toasting enhances their natural flavors and adds a delightful crunch.
If you’re looking for a vegan version, simply replace Greek yogurt with a plant-based yogurt of your choice. Additionally, you can prepare the smoothie in advance and store it in the refrigerator for up to 24 hours, giving it a quick stir or blend before serving to restore its creamy texture.
Follow us on Social Media!
I’m Nina, and I’m very passionate about spirituality. Exploring the depths of the soul and connecting with the divine has always been my source of inspiration. Join me on a journey of self-discovery and inner peace through my writing.

