When I first swapped my usual pasta for zucchini noodles, I was amazed at how vibrant and fresh my plate looked.
The taste was just as delightful as I had hoped.
Twirl those green spirals onto your fork, and coat them with a rich, homemade pesto that bursts with flavor in every bite.
It’s so easy—just spiralize, sauté, and blend your favorite pesto ingredients.
And this is just the start of our delicious low-carb journey together!
Zucchini Noodles With Pesto
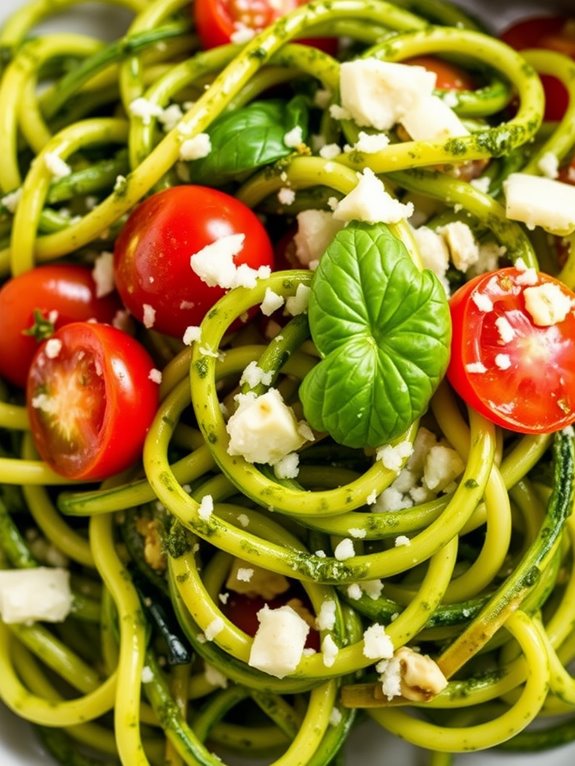
Zucchini Noodles With Pesto is a delicious and healthy low-carb dinner option that’s both satisfying and flavorful. This dish combines spiralized zucchini with a rich and aromatic homemade pesto sauce, offering a fresh and vibrant take on traditional pasta. The zucchini noodles, also known as “zoodles,” provide a nutritious base that isn’t only low in carbohydrates but also high in vitamins and minerals.
Paired with a creamy pesto sauce made from fresh basil, garlic, nuts, and Parmesan cheese, this meal is perfect for those looking to enjoy a light yet tasty dinner. This recipe isn’t only quick and easy to prepare but also highly customizable, allowing you to adjust the ingredients to suit your taste preferences.
Whether you’re following a low-carb diet or simply looking for a new way to enjoy your vegetables, Zucchini Noodles With Pesto is a versatile dish that can be enjoyed by the whole family. With just a few simple steps, you can create a delicious meal that’s perfect for busy weeknights or a leisurely weekend dinner.
Ingredients for 4-6 people:
- 4 medium zucchinis
- 2 cups fresh basil leaves
- 1/2 cup grated Parmesan cheese
- 1/3 cup pine nuts or walnuts
- 2 cloves garlic
- 1/2 cup olive oil
- Salt and pepper to taste
- Optional: cherry tomatoes, halved
- Optional: grilled chicken or shrimp for protein
Cooking Instructions:
- Prepare the Zucchini Noodles: Wash the zucchinis thoroughly. Using a spiralizer, spiralize the zucchinis into noodle-like strands. Set the zoodles aside in a large bowl.
- Make the Pesto Sauce: In a food processor, combine the basil leaves, Parmesan cheese, pine nuts or walnuts, and garlic cloves. Pulse until the ingredients are finely chopped. With the processor running, slowly drizzle in the olive oil until the mixture is smooth and well combined. Season with salt and pepper to taste.
- Combine the Zoodles and Pesto: In a large skillet over medium heat, add the zucchini noodles and cook for 2-3 minutes, tossing gently with tongs until slightly softened. Remove from heat and add the prepared pesto sauce. Toss until the zoodles are evenly coated with the pesto.
- Optional Additions: If desired, stir in halved cherry tomatoes for a burst of color and flavor. For additional protein, add grilled chicken or shrimp on top of the zoodles.
- Serve and Enjoy: Transfer the zucchini noodles with pesto to serving plates. Garnish with extra Parmesan cheese and fresh basil leaves if desired. Serve immediately.
Extra Tips: When preparing zucchini noodles, it’s important not to overcook them as they can become mushy. Cooking them for just a few minutes will help maintain their texture and prevent them from releasing too much water.
If you don’t have a spiralizer, you can use a julienne peeler or a mandolin to create similar noodle-like strands. Additionally, the pesto sauce can be made in advance and stored in the refrigerator for up to a week, making meal preparation even quicker.
Cauliflower Fried Rice
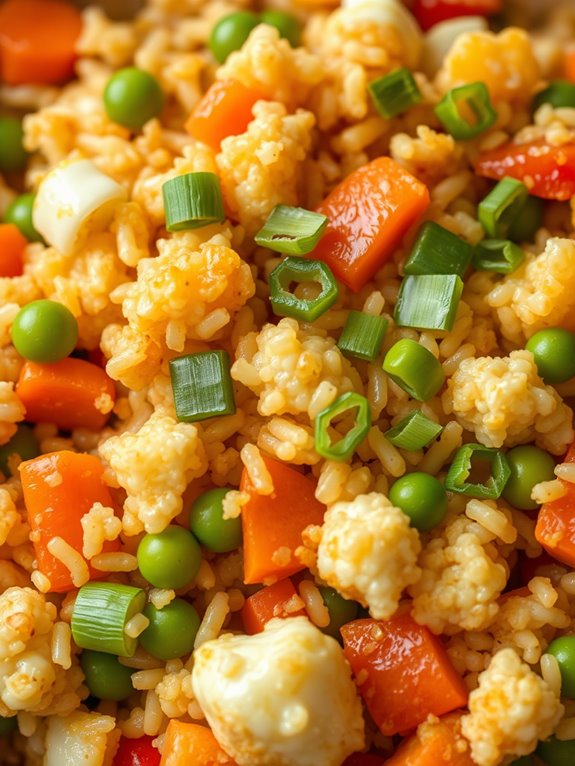
Cauliflower Fried Rice is a delightful low-carb alternative to traditional fried rice, offering a great way to enjoy a flavorful and satisfying meal while keeping your carb intake in check. This dish incorporates the textures and flavors you love from classic fried rice, but substitutes rice with finely chopped cauliflower, making it a healthier option without sacrificing taste.
Packed with vegetables, protein, and savory seasonings, Cauliflower Fried Rice is perfect for anyone looking to maintain a balanced diet without giving up their favorite comfort foods.
This recipe is designed to serve 4-6 people and can easily be adjusted to suit your taste preferences by adding or subtracting ingredients. It makes a wonderful weeknight dinner option since it comes together quickly and requires minimal preparation. The use of fresh vegetables and lean proteins makes this dish not only nutritious but also incredibly versatile.
You can even customize it by adding your favorite proteins like chicken, shrimp, or tofu for a complete meal that everyone at the table will enjoy.
Ingredients for Cauliflower Fried Rice (Serves 4-6):
- 1 large head of cauliflower
- 2 tablespoons sesame oil
- 3 cloves garlic, minced
- 1 cup frozen peas and carrots, thawed
- 1 bell pepper, diced
- 1 small onion, diced
- 3 green onions, sliced
- 3 large eggs, beaten
- 3 tablespoons soy sauce (or tamari for gluten-free)
- 1 tablespoon oyster sauce
- 1/2 teaspoon ground ginger
- Salt and pepper to taste
- Optional: cooked chicken, shrimp, or tofu
Cooking Instructions:
- Prepare the Cauliflower Rice: Begin by removing the leaves and core from the cauliflower. Cut it into large florets and place them in a food processor. Pulse until the cauliflower resembles the size and texture of rice. Be careful not to over-process, or it will become mushy.
- Cook the Vegetables: Heat a large skillet or wok over medium-high heat. Add 1 tablespoon of sesame oil, and once heated, add the minced garlic, diced onion, diced bell pepper, and thawed peas and carrots. Stir-fry for about 3-5 minutes until the vegetables are tender.
- Add the Cauliflower Rice: Push the cooked vegetables to one side of the skillet, and add the remaining 1 tablespoon of sesame oil to the empty side. Add the cauliflower rice to the pan and mix it with the vegetables. Stir-fry for another 5-7 minutes until the cauliflower is tender but not mushy.
- Incorporate the Eggs: Create a well in the center of the skillet by pushing the cauliflower mixture to the sides. Pour the beaten eggs into the well. Scramble the eggs until fully cooked, then stir them into the cauliflower mixture.
- Season the Dish: Add the soy sauce, oyster sauce, ground ginger, and sliced green onions to the skillet. Stir everything together until well combined. If desired, add cooked chicken, shrimp, or tofu for added protein. Cook for another 2-3 minutes to heat through.
- Taste and Adjust: Taste the cauliflower fried rice and season with salt and pepper as needed. Serve hot.
Extra Tips:
To achieve the best texture for your cauliflower fried rice, make sure not to overcrowd the pan as it can cause the cauliflower to steam rather than fry, resulting in a soggier texture.
If you’re short on time, pre-packaged cauliflower rice is a convenient option and works just as well. Feel free to experiment with additional vegetables or proteins to suit your taste. Ultimately, for a more authentic fried rice experience, try using a bit of fish sauce or a sprinkle of sesame seeds for extra depth of flavor.
Grilled Lemon Garlic Salmon
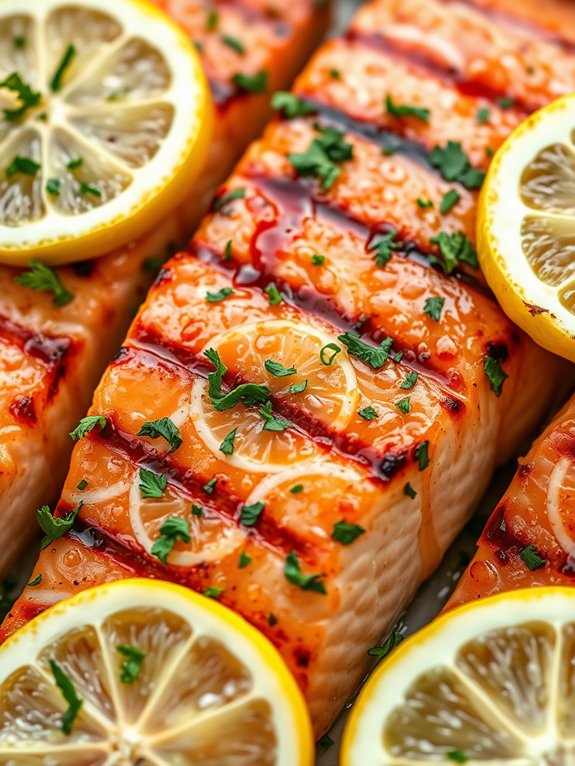
Grilled Lemon Garlic Salmon is a delicious and healthy low-carb dinner option that’s both simple to prepare and packed with flavor. This dish features succulent salmon fillets marinated in a zesty blend of lemon juice, garlic, and herbs, then perfectly grilled to bring out the natural sweetness of the fish.
With its bright and fresh flavors, this salmon recipe is sure to become a family favorite while offering a nutritious meal that aligns with a low-carb lifestyle. Perfect for a quick weeknight dinner or a special occasion, Grilled Lemon Garlic Salmon pairs beautifully with a variety of side dishes, such as a fresh green salad or roasted vegetables.
The combination of lemon and garlic not only enhances the taste but also provides numerous health benefits, making this recipe a delightful and wholesome choice. This recipe serves 4-6 people, making it ideal for a small gathering or a family meal.
Ingredients:
- 4-6 salmon fillets (about 6 oz each)
- 3 tablespoons olive oil
- 3 tablespoons fresh lemon juice
- 4 cloves garlic, minced
- 1 tablespoon fresh parsley, chopped
- 1 tablespoon fresh dill, chopped
- Salt and pepper to taste
- Lemon slices for garnish
Cooking Instructions:
- Prepare the Marinade: In a medium bowl, combine the olive oil, fresh lemon juice, minced garlic, chopped parsley, and chopped dill. Mix well to guarantee that all ingredients are evenly distributed. Season the marinade with salt and pepper to taste.
- Marinate the Salmon: Place the salmon fillets in a shallow dish or a resealable plastic bag. Pour the marinade over the salmon, making sure each fillet is well-coated. Let the salmon marinate in the refrigerator for at least 30 minutes to an hour to allow the flavors to penetrate the fish.
- Preheat the Grill: While the salmon is marinating, preheat your grill to medium-high heat. Make certain the grill grates are clean and lightly oiled to prevent the fish from sticking.
- Grill the Salmon: Remove the salmon from the marinade and place it on the grill, skin side down. Grill the fillets for about 4-6 minutes per side, depending on the thickness of the fillets. The salmon is done when it flakes easily with a fork and has an opaque color throughout.
- Serve: Once cooked, remove the salmon from the grill and let it rest for a couple of minutes. Garnish with fresh lemon slices and an additional sprinkle of chopped herbs if desired. Serve immediately with your choice of low-carb side dishes.
Extra Tips:
When grilling salmon, it’s essential to avoid overcooking, as this can lead to a dry texture. Keep an eye on the cooking time and test for doneness frequently.
Additionally, if you prefer a more robust flavor, consider adding a pinch of red pepper flakes or a dash of smoked paprika to the marinade for a slight kick.
Finally, if you don’t have access to an outdoor grill, this recipe can be easily adapted for indoor cooking using a grill pan or broiler.
Stuffed Bell Peppers
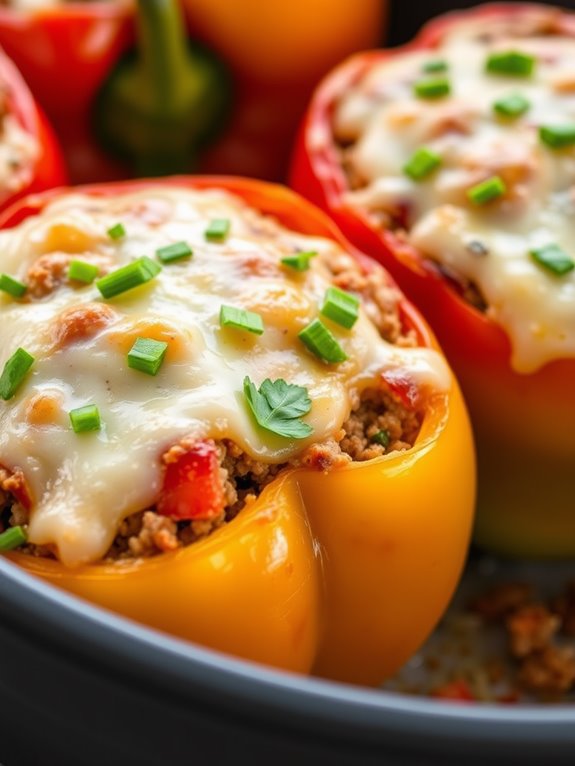
Stuffed bell peppers are a classic dish that can be easily adapted for a low-carb diet. By replacing the traditional rice filling with a mixture of cauliflower rice and savory ground meat, you can enjoy this satisfying meal without the extra carbs.
Bell peppers provide a naturally sweet and slightly smoky flavor that pairs perfectly with the hearty filling, making this dish both nutritious and delicious. This recipe isn’t only simple to prepare but also versatile, allowing you to customize the filling with your favorite herbs, spices, and cheeses.
This low-carb stuffed bell peppers recipe is perfect for a family dinner or meal prep, serving 4-6 people. It’s a wholesome dish packed with protein, vegetables, and flavor. Whether you’re following a low-carb lifestyle or just looking for a nutritious meal option, these stuffed peppers are sure to please.
With a few easy steps, you can have a healthy and satisfying dinner on the table in no time.
Ingredients:
- 6 large bell peppers (any color)
- 1 pound ground turkey or beef
- 1 cup cauliflower rice
- 1 small onion, diced
- 2 cloves garlic, minced
- 1 cup canned diced tomatoes, drained
- 1 cup shredded mozzarella cheese
- 1 teaspoon dried oregano
- 1 teaspoon smoked paprika
- Salt and pepper to taste
- 2 tablespoons olive oil
- 2 tablespoons chopped fresh parsley (optional, for garnish)
Cooking Instructions:
- Preheat the Oven: Begin by preheating your oven to 375°F (190°C). This guarantees that the oven is ready for baking once the peppers are stuffed.
- Prepare the Bell Peppers: Wash the bell peppers thoroughly. Slice the tops off and remove the seeds and membranes inside. Drizzle a little olive oil inside the peppers and place them upright in a baking dish.
- Cook the Filling: In a large skillet over medium heat, add the olive oil. Once heated, add the diced onion and minced garlic. Sauté until the onion is translucent and fragrant, about 3-4 minutes.
- Add Meat and Seasoning: Add the ground turkey or beef to the skillet. Cook until browned, breaking it up with a wooden spoon as it cooks. Season with oregano, smoked paprika, salt, and pepper.
- Mix in Cauliflower Rice and Tomatoes: Stir in the cauliflower rice and drained diced tomatoes. Cook for another 5 minutes, allowing the flavors to meld together and the cauliflower to soften slightly.
- Stuff the Peppers: Spoon the filling mixture into each prepared bell pepper, packing it in tightly. Top each stuffed pepper with a generous sprinkle of shredded mozzarella cheese.
- Bake the Peppers: Cover the baking dish with aluminum foil and place it in the preheated oven. Bake for 30 minutes, then remove the foil and bake for an additional 10 minutes, or until the cheese is bubbly and golden.
- Garnish and Serve: Remove the stuffed peppers from the oven and let cool slightly. Sprinkle with chopped fresh parsley if desired, and serve warm.
Extra Tips:
To guarantee your stuffed bell peppers have the best texture, consider pre-baking the empty peppers for about 10 minutes before stuffing them. This step helps to soften them slightly, ensuring they’re perfectly tender once baked with the filling.
Additionally, feel free to experiment with different types of cheese or add a dash of hot sauce for extra flavor. If you prefer a vegetarian version, substitute the meat with a mixture of mushrooms and zucchini for a delicious plant-based option.
Chicken Alfredo Spaghetti Squash
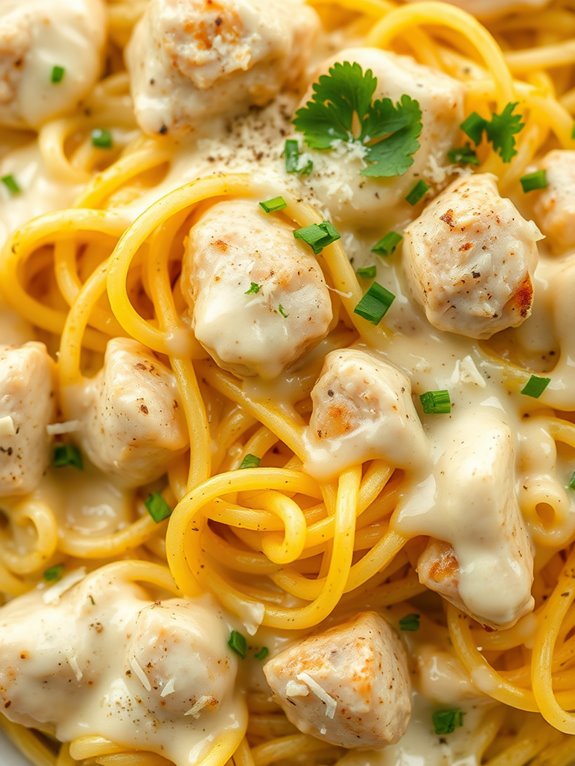
Looking for a delicious low-carb dinner option that doesn’t skimp on flavor? This Chicken Alfredo Spaghetti Squash is just the dish for you. By substituting traditional pasta with spaghetti squash, you can enjoy a healthy and satisfying meal. The creamy Alfredo sauce, made from scratch, pairs perfectly with tender chicken and the naturally sweet strands of spaghetti squash, creating a dish that’s both comforting and nutritious.
Spaghetti squash is a fantastic alternative to pasta, providing a similar texture with considerably fewer carbohydrates. When roasted, it yields soft, spaghetti-like strands that soak up the rich, cheesy Alfredo sauce beautifully. Combined with sautéed chicken breast and a hint of garlic, this meal is perfect for those following a low-carb or keto diet. Plus, it’s simple to prepare and sure to be a hit with the whole family.
Ingredients for 4-6 servings:
- 2 medium spaghetti squashes
- 2 tablespoons olive oil
- Salt and pepper to taste
- 1 pound boneless, skinless chicken breasts
- 1 tablespoon butter
- 4 cloves garlic, minced
- 1 cup heavy cream
- 1 cup Parmesan cheese, grated
- 1 teaspoon Italian seasoning
- Fresh parsley, chopped (optional, for garnish)
Cooking Instructions:
- Prepare the Spaghetti Squash: Preheat your oven to 400°F (200°C). Cut the spaghetti squashes in half lengthwise and scoop out the seeds. Drizzle the inside of each half with olive oil and season with salt and pepper. Place them cut side down on a baking sheet lined with parchment paper. Roast for 30-40 minutes, or until the flesh is tender and easily shredded with a fork.
- Cook the Chicken: While the squash is roasting, cut the chicken breasts into bite-sized pieces. Heat the remaining olive oil in a large skillet over medium heat. Add the chicken pieces and cook until browned and cooked through, about 6-8 minutes. Remove the chicken from the skillet and set aside.
- Make the Alfredo Sauce: In the same skillet, melt the butter over medium heat. Add the minced garlic and sauté until fragrant, about 1 minute. Pour in the heavy cream and stir, allowing it to simmer for 2-3 minutes. Gradually add the grated Parmesan cheese, stirring continuously until the sauce is smooth and thickened. Season with Italian seasoning, salt, and pepper.
- Combine Ingredients: When the spaghetti squash is done roasting, use a fork to shred the flesh into spaghetti-like strands. Add the shredded squash and cooked chicken to the Alfredo sauce in the skillet. Stir to combine, making sure the squash and chicken are well coated in the sauce.
- Serve: Transfer the Chicken Alfredo Spaghetti Squash to serving plates. Garnish with fresh parsley if desired. Serve immediately while hot.
Extra Tips:
To guarantee the spaghetti squash cooks evenly, make sure to pierce the skin with a fork a few times before roasting. This allows steam to escape and prevents the squash from becoming mushy.
If you prefer a thicker Alfredo sauce, reduce the amount of cream slightly or add more Parmesan cheese. For added flavor, consider sprinkling a bit of crushed red pepper flakes into the sauce for a slight kick. Enjoy this dish with a side salad for a complete meal.
Shrimp Avocado Salad
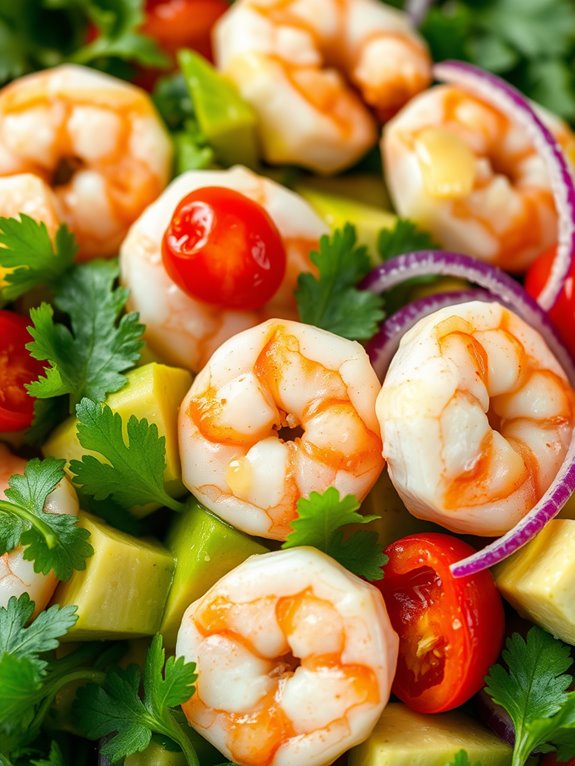
Shrimp Avocado Salad is a delightful low-carb dish that brings together the freshness of seafood with the creamy texture of avocado. This vibrant salad is perfect for a light dinner or a healthy lunch option, offering a wonderful medley of flavors and nutrients. The combination of zesty lime, crunchy vegetables, and succulent shrimp creates a revitalizing and satisfying meal that’s both nourishing and delicious.
Whether you’re on a low-carb diet or simply looking for a healthy dinner alternative, this salad is sure to hit the spot. This recipe serves 4-6 people, making it ideal for family dinners or small gatherings. It’s a simple yet elegant dish that doesn’t require much time, allowing you to enjoy more moments with your loved ones.
The preparation involves cooking the shrimp to perfection and tossing them with fresh vegetables and a tangy dressing, creating a dish that’s rich in protein, healthy fats, and essential vitamins. Let’s explore the ingredients needed to create this mouthwatering Shrimp Avocado Salad.
Ingredients:
- 1 1/2 pounds of large shrimp, peeled and deveined
- 3 ripe avocados, diced
- 1 cup cherry tomatoes, halved
- 1/2 red onion, thinly sliced
- 1/4 cup fresh cilantro, chopped
- 2 limes, juiced
- 3 tablespoons olive oil
- 1 teaspoon garlic powder
- Salt and pepper to taste
- Mixed greens (optional, for serving)
Cooking Instructions:
- Prepare the Shrimp: Start by rinsing the shrimp under cold water and patting them dry with a paper towel. Season the shrimp with garlic powder, salt, and pepper to taste.
- Cook the Shrimp: Heat 2 tablespoons of olive oil in a large skillet over medium-high heat. Add the seasoned shrimp and cook for about 2-3 minutes on each side, or until they turn pink and are cooked through. Remove the shrimp from the skillet and set them aside to cool slightly.
- Prepare the Dressing: In a small bowl, whisk together the lime juice, the remaining tablespoon of olive oil, a pinch of salt, and pepper. This will serve as a light and zesty dressing for the salad.
- Assemble the Salad: In a large mixing bowl, combine the diced avocados, cherry tomatoes, sliced red onion, and chopped cilantro. Pour the dressing over the vegetables and gently toss to combine.
- Add the Shrimp: Once the shrimp have cooled slightly, add them to the salad mixture. Toss everything together gently to make sure the shrimp is well coated with the dressing and mixed with the vegetables.
- Serve: If desired, serve the shrimp avocado salad over a bed of mixed greens for added texture and vibrancy. Adjust the seasoning with additional salt and pepper if needed.
Extra Tips:
For the best flavor, use ripe avocados that are firm but yield slightly to gentle pressure. If you prefer a spicier kick, consider adding a finely chopped jalapeño pepper to the salad.
The salad can be prepared a few hours in advance; just add the avocados and shrimp right before serving to maintain their vibrancy. If you find yourself with leftovers, store them in an airtight container and consume them within a day to enjoy the best taste and texture.
Beef and Broccoli Stir-Fry
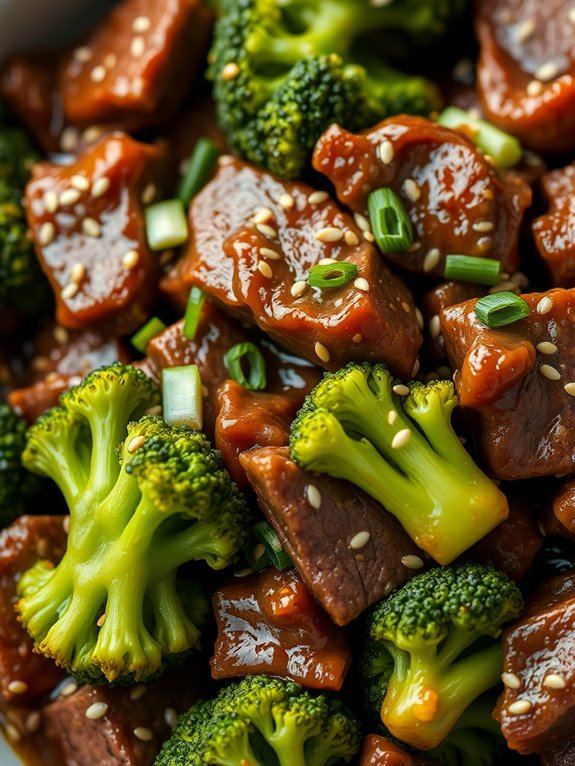
Beef and Broccoli Stir-Fry is a classic dish that combines tender slices of beef with crisp, vibrant broccoli in a savory, umami-rich sauce. This dish isn’t only delicious but also low in carbohydrates, making it a perfect option for those looking to enjoy a healthy meal without sacrificing flavor.
The combination of beef and broccoli provides a great balance of protein and fiber, ensuring that you feel satisfied and nourished. This easy-to-make stir-fry is perfect for a weeknight dinner as it comes together quickly, using just a few key ingredients that you probably already have in your pantry.
The secret to a great stir-fry lies in the sauce and the cooking process, which involves high heat to sear the beef and lock in its juices while keeping the broccoli bright and crunchy. Whether you’re following a low-carb diet or simply looking for a nutritious meal, this Beef and Broccoli Stir-Fry is sure to become a go-to recipe in your kitchen.
Ingredients (Serves 4-6):
- 1 1/2 pounds flank steak, thinly sliced against the grain
- 4 cups broccoli florets
- 3 tablespoons soy sauce
- 2 tablespoons oyster sauce
- 1 tablespoon sesame oil
- 2 tablespoons olive oil
- 1 tablespoon cornstarch
- 1 tablespoon rice vinegar
- 3 cloves garlic, minced
- 1 tablespoon ginger, minced
- 1/2 teaspoon red pepper flakes (optional)
- Salt and pepper to taste
- 2 green onions, sliced for garnish
- Sesame seeds for garnish
Cooking Instructions:
- Prepare the Beef: In a medium bowl, combine sliced flank steak, 1 tablespoon of soy sauce, and cornstarch. Mix well to coat the beef and let it marinate for at least 15 minutes. This will help tenderize the meat and create a smooth sauce.
- Make the Sauce: In a small bowl, whisk together the remaining soy sauce, oyster sauce, sesame oil, and rice vinegar. Set aside for later use.
- Cook the Broccoli: Heat 1 tablespoon of olive oil in a large skillet or wok over medium-high heat. Add the broccoli florets and stir-fry for about 4-5 minutes until they’re bright green and tender-crisp. Remove the broccoli from the skillet and set aside.
- Cook the Beef: In the same skillet, heat the remaining olive oil. Add the minced garlic, ginger, and red pepper flakes (if using), and stir-fry for about 30 seconds until fragrant. Increase the heat to high, then add the marinated beef in a single layer. Let the beef sear for about 2 minutes on one side before stirring. Cook for another 3-4 minutes until the beef is browned and cooked through.
- Combine and Serve: Return the broccoli to the skillet with the beef. Pour the prepared sauce over the beef and broccoli, stirring to combine all the elements. Cook for another 1-2 minutes until everything is heated through and the sauce coats the beef and broccoli. Season with salt and pepper to taste.
- Garnish and Serve: Transfer the stir-fry to a serving dish. Garnish with sliced green onions and sesame seeds. Serve immediately and enjoy your healthy low-carb Beef and Broccoli Stir-Fry.
Extra Tips:
For the best results, make sure to slice the beef thinly and uniformly. This allows it to cook quickly and evenly. If you find it difficult to slice the beef thinly, try freezing it for about 20 minutes before cutting.
Additionally, using a high smoke point oil like olive or avocado oil is essential for achieving the perfect stir-fry sear. Finally, feel free to adjust the level of heat by adding more or less red pepper flakes, or omitting them completely if you prefer a milder dish.
Eggplant Lasagna
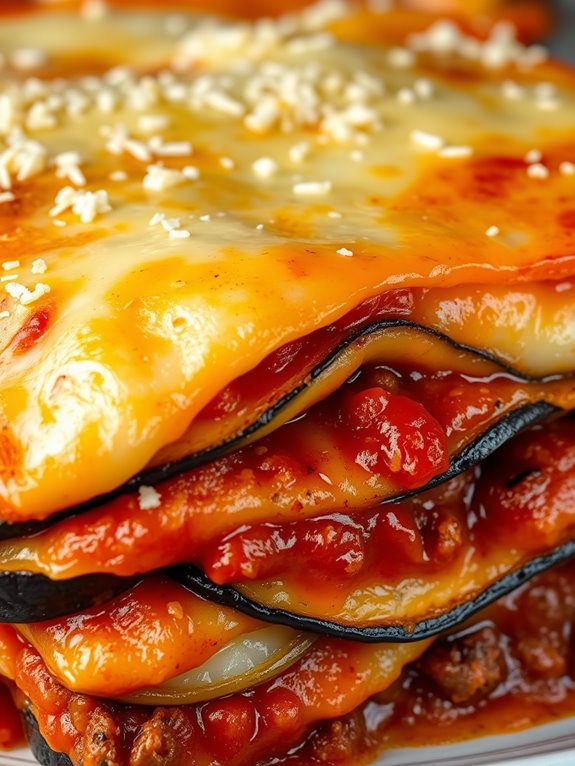
Eggplant Lasagna is a delicious and healthy alternative to traditional lasagna, with layers of thinly sliced eggplant replacing pasta sheets. This low-carb dish is perfect for those looking to enjoy a hearty meal without the extra carbohydrates. The eggplant provides a rich, tender texture that pairs beautifully with the savory flavors of marinara sauce and melted cheese.
Perfect for a family dinner or meal prep, this eggplant lasagna is sure to become a favorite go-to recipe for those following a low-carb diet. This recipe serves 4-6 people and features a delightful combination of ingredients that come together to create a comforting and satisfying meal.
You’ll enjoy the heartiness of the ground meat, the tartness of the marinara sauce, and the creamy goodness of ricotta and mozzarella cheese. Plus, you’ll be adding a nutritious vegetable in the form of eggplant, making this dish not only delicious but also packed with nutrients. Here’s everything you need to get started on this scrumptious Eggplant Lasagna.
Ingredients:
- 2 large eggplants, sliced lengthwise into 1/4 inch thick slices
- 1 pound ground beef or turkey
- 2 cups marinara sauce
- 1 cup ricotta cheese
- 2 cups shredded mozzarella cheese
- 1/2 cup grated Parmesan cheese
- 1 egg
- 2 cloves garlic, minced
- 1 tablespoon olive oil
- Salt and pepper to taste
- Fresh basil leaves for garnish (optional)
Instructions:
1. Preheat the Oven: Preheat your oven to 375°F (190°C).
2. Prepare the Eggplant: Lay the eggplant slices on a baking sheet. Sprinkle lightly with salt and let them sit for about 15 minutes to draw out excess moisture. Pat the slices dry with paper towels.
3. Cook the Ground Meat: In a large skillet, heat the olive oil over medium heat. Add the minced garlic and sauté for about 1 minute until fragrant. Add the ground meat to the skillet and cook until browned. Drain any excess fat, then stir in the marinara sauce. Let it simmer for 5 minutes. Season with salt and pepper to taste.
4. Prepare the Cheese Mixture: In a mixing bowl, combine the ricotta cheese, egg, and half of the grated Parmesan cheese. Mix well until thoroughly combined.
5. Assemble the Lasagna: Spread a thin layer of the meat sauce in the bottom of a 9×13 inch baking dish. Place a layer of eggplant slices over the sauce. Spread half of the ricotta mixture over the eggplant, followed by a layer of the meat sauce. Sprinkle a layer of mozzarella cheese on top.
Repeat the layers, finishing with a layer of eggplant and the remaining meat sauce. Top with the rest of the mozzarella cheese and the remaining Parmesan cheese.
6. Bake: Cover the baking dish with aluminum foil and bake in the preheated oven for 25 minutes. Remove the foil and bake for an additional 15 minutes, or until the cheese is bubbly and golden brown.
7. Serve: Let the lasagna cool for about 10 minutes before slicing. Garnish with fresh basil leaves if desired.
Extra Tips:
To guarantee your eggplant lasagna isn’t watery, it’s essential to draw out as much moisture as possible from the eggplant slices before baking. Salting the slices and letting them sit is an effective way to do this.
For a more robust flavor, consider adding Italian seasoning to the meat sauce. If you prefer a vegetarian option, you can substitute the ground meat with a variety of sautéed vegetables like mushrooms, zucchini, or bell peppers.
Finally, feel free to adjust the cheese quantities to suit your taste preferences.
Turkey Lettuce Wraps
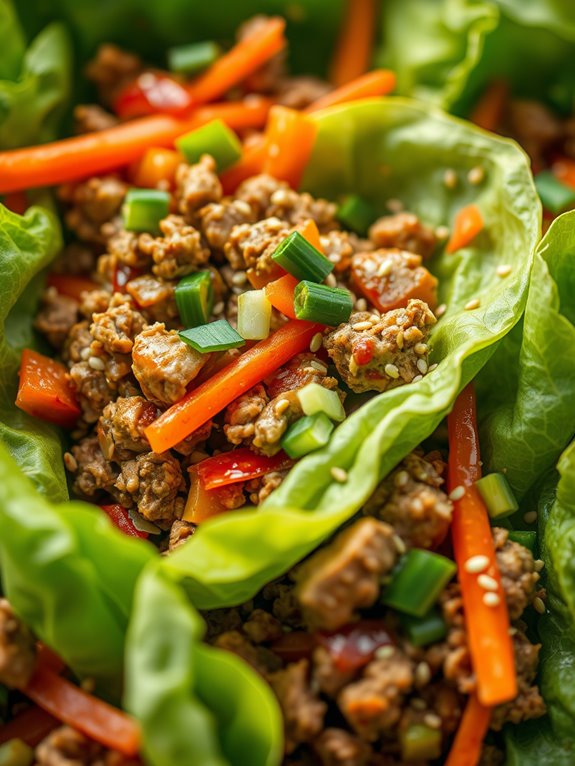
Turkey Lettuce Wraps are a perfect low-carb dinner option that’s both flavorful and satisfying. This dish combines lean ground turkey with fresh vegetables and a savory sauce, all wrapped in crisp lettuce leaves. It’s not only a healthy alternative to traditional wraps, but it’s also quick to prepare and makes for a delightful meal that’s both light and filling.
Turkey Lettuce Wraps are ideal for those who are looking to lower their carbohydrate intake without sacrificing taste or nutrition. These wraps are versatile and can be customized to suit your taste preferences. Whether you’re enjoying them as a main dish or serving them as a fun appetizer for a gathering, they’re sure to please a crowd.
The contrast between the warm, savory turkey filling and the cool, crunchy lettuce creates a rejuvenating balance of textures and flavors. In this recipe, we’ll guide you through making Turkey Lettuce Wraps that serve 4-6 people.
Ingredients:
- 1 pound ground turkey
- 1 tablespoon olive oil
- 1 small onion, finely chopped
- 2 cloves garlic, minced
- 1 red bell pepper, diced
- 1 cup shredded carrots
- 2 tablespoons soy sauce
- 1 tablespoon hoisin sauce
- 1 tablespoon rice vinegar
- 1 teaspoon grated fresh ginger
- 1 teaspoon sesame oil
- Salt and pepper to taste
- 1 head of butter or iceberg lettuce, leaves separated
- Optional toppings: chopped green onions, sesame seeds, and sriracha sauce
Instructions:
- Prepare the Ingredients: Begin by washing and drying the lettuce leaves. Set them aside on a plate lined with paper towels to absorb any excess moisture. Finely chop the onion and dice the red bell pepper. Mince the garlic and grate the fresh ginger.
- Cook the Turkey: In a large skillet, heat the olive oil over medium heat. Once the oil is hot, add the chopped onion and sauté for about 2 minutes until it becomes translucent. Add the minced garlic and cook for an additional 30 seconds until fragrant.
- Add Vegetables and Turkey: Stir in the diced red bell pepper and shredded carrots. Cook for about 3 minutes until the vegetables start to soften. Push the vegetables to one side of the skillet and add the ground turkey to the empty side. Cook the turkey, breaking it apart with a spatula, until it’s browned and cooked through, approximately 5-7 minutes.
- Season the Mixture: Once the turkey is fully cooked, mix it with the vegetables. Add the soy sauce, hoisin sauce, rice vinegar, grated ginger, and sesame oil. Stir everything together until well combined. Season with salt and pepper to taste. Let the mixture simmer for an additional 2 minutes to allow the flavors to meld.
- Assemble the Wraps: Remove the skillet from the heat. To serve, spoon a generous portion of the turkey and vegetable mixture into each lettuce leaf. Top with optional toppings such as chopped green onions, sesame seeds, and a drizzle of sriracha sauce for a spicy kick.
Extra Tips:
For a more substantial meal, consider adding additional vegetables such as water chestnuts or mushrooms to the turkey filling. If you’re looking for more spice, you can increase the amount of sriracha or add a pinch of crushed red pepper flakes during cooking.
Make sure the lettuce leaves are completely dry before adding the turkey mixture to prevent sogginess. These wraps can be made ahead of time; simply store the turkey mixture separately and assemble just before serving to maintain the lettuce’s crispiness.
Spinach and Feta Stuffed Chicken
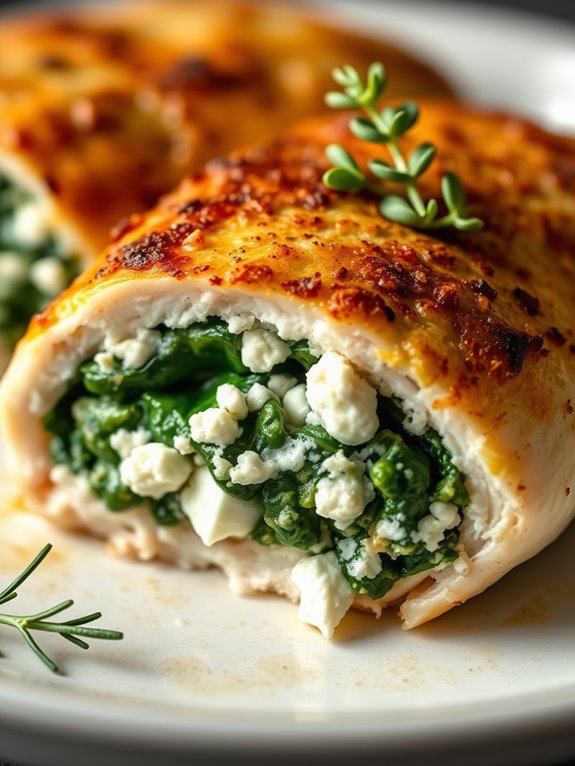
Spinach and Feta Stuffed Chicken is a delightful, low-carb dish that combines the rich flavors of creamy feta cheese with the earthy goodness of spinach, all encased in juicy chicken breasts. This recipe is perfect for dinner parties or a simple family meal, bringing gourmet flavors to your table without compromising your healthy eating habits.
The stuffing adds a burst of flavor that complements the mildness of the chicken, making it a satisfying and nutrient-rich dish. Not only is this recipe delicious, but it’s also high in protein and low in carbohydrates, aligning with a balanced diet.
This dish is ideal for a serving size of 4-6 people, making it versatile for a medium-sized gathering or for leftovers that can be enjoyed the next day. The preparation involves creating a delicious stuffing mixture that combines sautéed spinach and feta cheese, and then carefully filling chicken breasts with this mixture before baking them to perfection.
The result is a succulent, flavor-packed chicken dish that’s sure to impress your guests and satisfy your cravings.
Ingredients (Serves 4-6):
- 4-6 boneless, skinless chicken breasts
- 1 cup fresh spinach, chopped
- 1 cup feta cheese, crumbled
- 2 cloves garlic, minced
- 1 tablespoon olive oil
- 1 teaspoon dried oregano
- Salt and pepper to taste
- Toothpicks or kitchen twine for securing
Cooking Instructions:
- Preheat the Oven: Start by preheating your oven to 375°F (190°C) to make certain it’s hot and ready for the chicken.
- Prepare the Stuffing: In a skillet over medium heat, add the olive oil and sauté the minced garlic until fragrant, about 1 minute. Add the chopped spinach and cook until wilted, approximately 3-4 minutes. Remove from heat and let it cool slightly.
- Mix the Filling: In a mixing bowl, combine the sautéed spinach, crumbled feta cheese, and dried oregano. Season with salt and pepper to taste. Mix well until the ingredients are evenly combined.
- Prepare the Chicken: Using a sharp knife, carefully slice a pocket into each chicken breast. Be sure not to cut all the way through, just enough to create a space for the filling.
- Stuff the Chicken: Fill each chicken breast pocket with the spinach and feta mixture, making sure it’s evenly distributed. Secure the opening with toothpicks or kitchen twine to prevent the filling from spilling out during cooking.
- Bake the Chicken: Place the stuffed chicken breasts on a baking tray lined with parchment paper. Season the outside of the chicken with additional salt and pepper. Bake in the preheated oven for 25-30 minutes or until the chicken is cooked through and reaches an internal temperature of 165°F (74°C).
- Rest and Serve: Once cooked, remove the chicken from the oven and let it rest for a few minutes before serving. This helps the juices redistribute throughout the meat, making sure it remains moist and flavorful.
Extra Tips:
For a more flavorful experience, consider marinating the chicken breasts in a mixture of olive oil, lemon juice, and herbs for a few hours before preparing the dish. This can add an additional layer of flavor to the chicken.
If you find the feta cheese too tangy, you can mix in some cream cheese to mellow it out. Always make certain the chicken is secured well with toothpicks or twine to prevent any stuffing from escaping during baking.
Finally, pair this dish with a simple side salad or roasted vegetables to keep the meal light and nutritious.
Baked Cod With Herbs
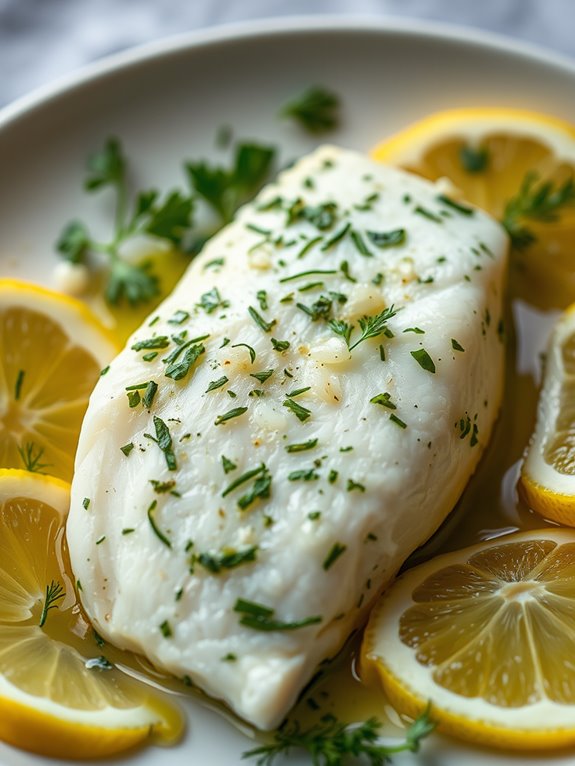
Baked Cod With Herbs is a delicious, healthy, and low-carb dinner option perfect for those seeking a nutritious meal without sacrificing flavor. This dish highlights the delicate, mild flavor of cod enhanced by a fragrant blend of fresh herbs. When baked to perfection, the cod becomes tender and flaky, making it an ideal centerpiece for dinner.
Paired with a simple side of vegetables or a green salad, this dish is both satisfying and guilt-free.
Preparing Baked Cod With Herbs is straightforward, requiring minimal ingredients and effort, yet resulting in an impressive and flavorful meal. The key to this recipe is the use of fresh herbs, which infuse the fish with a burst of aromatic flavors, complemented by a hint of lemon. This recipe serves 4-6 people, making it a fantastic option for family dinners or small gatherings.
Ingredients for 4-6 people:
- 4-6 cod fillets (about 6 ounces each)
- 3 tablespoons olive oil
- 2 tablespoons lemon juice
- 1 teaspoon lemon zest
- 3 cloves garlic, minced
- 1/4 cup fresh parsley, chopped
- 1/4 cup fresh dill, chopped
- 1/4 cup fresh basil, chopped
- Salt, to taste
- Black pepper, to taste
- Lemon wedges, for serving
Instructions:
- Preheat the oven: Start by preheating your oven to 400°F (200°C). This guarantees that the oven is at the right temperature for even cooking of the fish.
- Prepare the baking dish: Lightly grease a baking dish with olive oil to prevent the cod from sticking during cooking.
- Make the herb mixture: In a small bowl, combine the olive oil, lemon juice, lemon zest, minced garlic, chopped parsley, dill, and basil. Mix well to create a fragrant herb mixture.
- Season the cod: Pat the cod fillets dry with paper towels to remove excess moisture. Season both sides with salt and black pepper to taste.
- Coat the cod with herbs: Place the cod fillets in the prepared baking dish. Spoon the herb mixture over the fillets, ensuring they’re evenly coated. Use the back of a spoon to spread the mixture if necessary.
- Bake the cod: Transfer the baking dish to the preheated oven. Bake for 12-15 minutes, or until the cod is opaque and flakes easily with a fork. The exact cooking time may vary based on the thickness of the fillets.
- Serve: Remove the baked cod from the oven and let it rest for a few minutes. Serve with lemon wedges for an extra burst of citrus flavor.
Extra Tips:
To guarantee the best results, always use fresh herbs rather than dried, as they provide a more vibrant flavor profile. If fresh herbs aren’t available, consider using a smaller quantity of dried herbs but note that the flavor will be less intense.
Additionally, feel free to experiment with other herbs such as thyme or chives for a different taste. Finally, make sure not to overcook the cod; it should be just cooked through and flaky for the best texture.
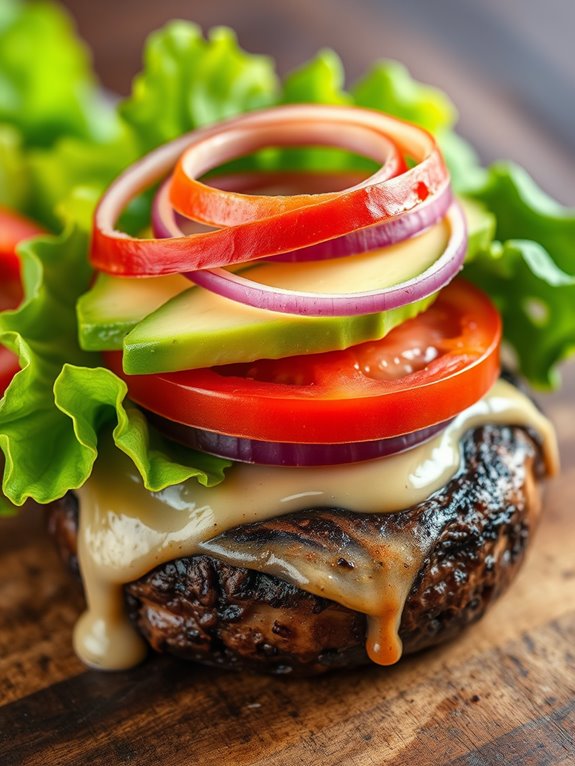
Portobello Mushroom Burgers
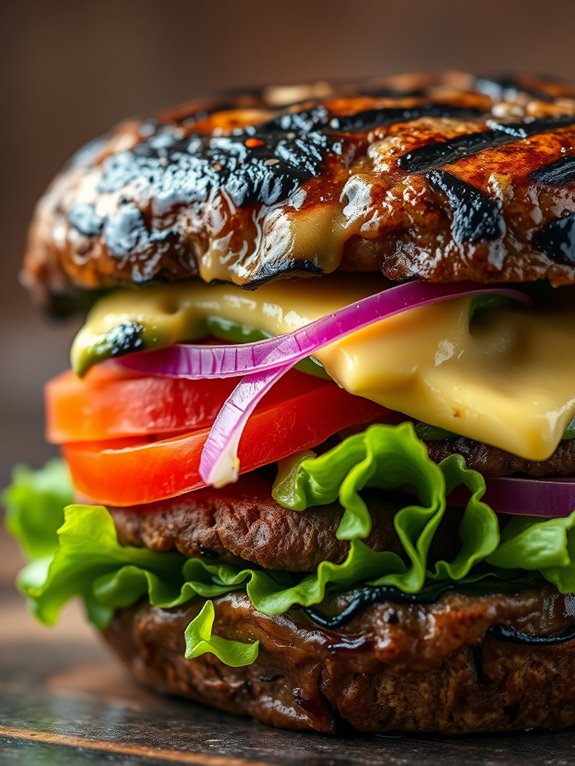
Portobello Mushroom Burgers are a delicious and healthy low-carb alternative to traditional beef burgers. These hearty mushrooms have a meaty texture and rich flavor that can easily hold up to your favorite burger toppings while keeping your meal light and nutritious.
Perfect for those following a low-carb or vegetarian diet, these burgers aren’t only satisfying but also quick and easy to prepare, making them an ideal choice for a weeknight dinner.
The key to a great Portobello Mushroom Burger is in the preparation of the mushrooms. By marinating them and then grilling, you enhance their natural umami flavor, making every bite a mouthwatering experience.
Pair these juicy mushroom caps with fresh vegetables and a creamy sauce for a complete meal that will leave you and your loved ones full and happy without the carb-heavy bun.
Ingredients (serving size: 4-6 people):
- 4-6 large Portobello mushroom caps
- 1/4 cup balsamic vinegar
- 1/4 cup olive oil
- 2 cloves garlic, minced
- 1 teaspoon dried basil
- 1 teaspoon dried oregano
- Salt and pepper to taste
- 4-6 slices of cheese (optional)
- 1 large tomato, sliced
- 1 red onion, sliced
- 1 avocado, sliced
- Lettuce leaves
- 4-6 whole grain or lettuce wraps
- Condiments of choice (such as mustard, mayonnaise, or aioli)
Cooking Instructions:
1. Prepare the Marinade: In a small bowl, whisk together the balsamic vinegar, olive oil, minced garlic, dried basil, dried oregano, salt, and pepper. This marinade will infuse the mushrooms with flavor and help them stay moist during cooking.
2. Marinate the Mushrooms: Place the Portobello mushroom caps in a shallow dish or a resealable plastic bag. Pour the marinade over the mushrooms, confirming each cap is well coated.
Let them marinate for at least 15-20 minutes, or up to an hour if time permits, to absorb the flavors.
3. Preheat the Grill: Heat your grill or grill pan to medium-high heat. If using a grill pan, lightly oil it to prevent sticking.
4. Grill the Mushrooms: Place the marinated mushrooms on the grill, gill side up. Cook for about 5 minutes on each side, or until the mushrooms are tender and have nice grill marks.
If using cheese, add a slice to each mushroom cap during the last minute of grilling to allow it to melt slightly.
5. Assemble the Burgers: Start by layering the lettuce leaves or placing the whole grain wrap on a plate. Add the grilled Portobello mushroom cap, followed by slices of tomato, red onion, and avocado.
Top with your choice of condiments and another lettuce leaf or wrap.
6. Serve and Enjoy: Serve the Portobello Mushroom Burgers immediately while they’re warm and juicy. Pair with a side salad or grilled vegetables for a complete low-carb meal.
Extra Tips:
For the best flavor, choose fresh and firm Portobello mushrooms. Confirm they’re cleaned properly by wiping them with a damp cloth rather than rinsing them under water, which can make them soggy.
Feel free to experiment with different herbs and spices in the marinade to suit your taste preferences. If you prefer a bit of heat, add a dash of chili flakes or hot sauce to the marinade.
When serving, keep your toppings varied to add different textures and flavors, and remember that presentation can make a simple dish feel special, so take a moment to stack your burger ingredients neatly.
Follow us on Social Media!
I’m Nina, and I’m very passionate about spirituality. Exploring the depths of the soul and connecting with the divine has always been my source of inspiration. Join me on a journey of self-discovery and inner peace through my writing.

