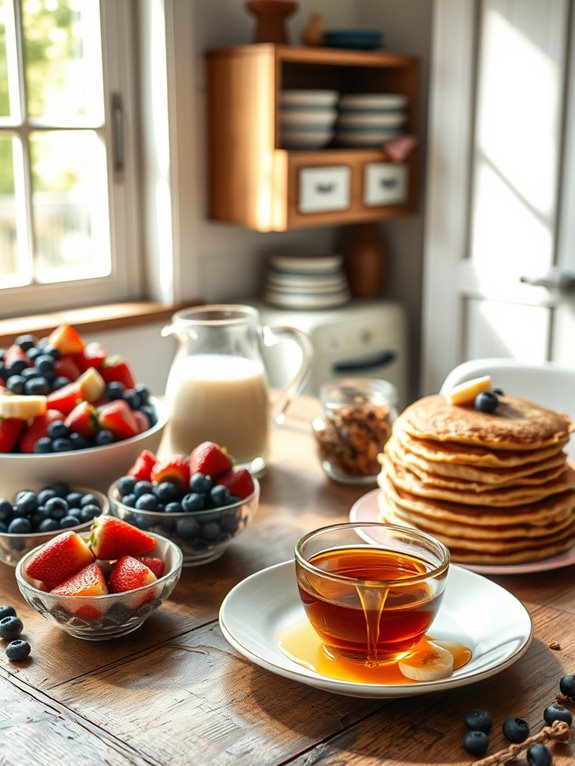
There’s nothing quite like the smell of cinnamon filling your kitchen in the morning.
Apple cinnamon waffles are a family favorite that can turn any breakfast into a delightful experience.
I’m excited to share some of my go-to healthy breakfast recipes that even the pickiest eaters will love.
From overnight oats to veggie omelette wraps, these ideas will make your mornings brighter and more delicious.
Let’s make breakfast the best meal of the day!
Overnight Oats Delight
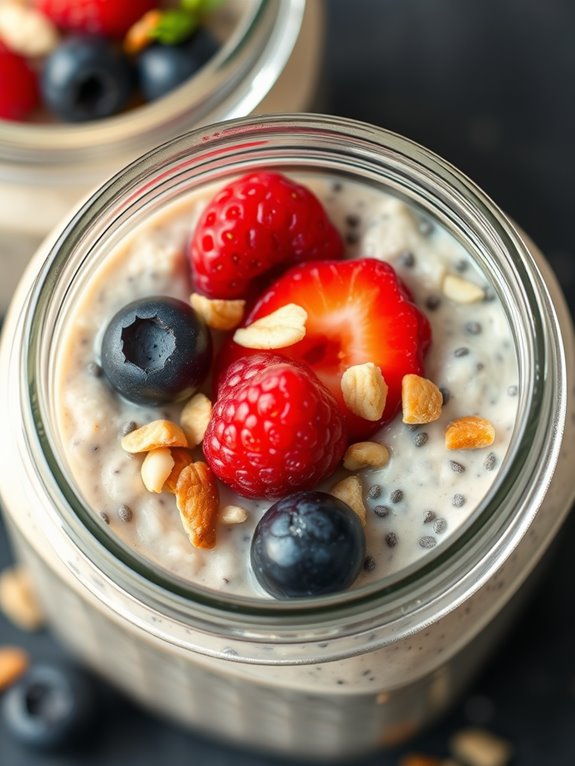
Overnight Oats Delight is a nutritious and convenient breakfast option that requires minimal preparation. Perfect for busy mornings, this recipe allows you to prepare a delicious and satisfying meal the night before. The oats soak overnight, absorbing the flavors and turning into a creamy, ready-to-eat breakfast by morning.
With a blend of wholesome ingredients, Overnight Oats Delight offers a balanced combination of fiber, protein, and healthy fats to keep you energized throughout the day.
This versatile recipe can be easily customized to suit your taste preferences or dietary needs. Whether you prefer the comforting sweetness of honey or the tartness of fresh berries, Overnight Oats Delight can be adapted to include your favorite ingredients. The following recipe serves 4-6 people, making it ideal for a family breakfast or meal prep for the week ahead.
Ingredients:
- 3 cups rolled oats
- 3 cups milk (dairy or non-dairy)
- 1 cup Greek yogurt
- 2 tablespoons chia seeds
- 2 tablespoons honey or maple syrup
- 1 teaspoon vanilla extract
- 1 teaspoon cinnamon
- 1 cup mixed berries (fresh or frozen)
- 1/2 cup chopped nuts (almonds, walnuts, or pecans)
- 1/4 cup shredded coconut (optional)
Instructions:
- Combine Ingredients: In a large mixing bowl, combine the rolled oats, milk, and Greek yogurt. Stir until all the oats are thoroughly coated with the liquid.
- Add Flavorings: Mix in the chia seeds, honey or maple syrup, vanilla extract, and cinnamon. Stir well to guarantee the chia seeds are evenly distributed throughout the mixture, as they’ll expand and thicken the oats overnight.
- Incorporate Fruits and Nuts: Gently fold in the mixed berries and chopped nuts. If using frozen berries, there’s no need to thaw them beforehand as they’ll defrost overnight. Add shredded coconut if desired for additional texture and flavor.
- Refrigerate Overnight: Transfer the mixture into a large airtight container or individual serving jars. Cover and refrigerate overnight, allowing the oats to soak up the liquid and flavors.
- Serve: In the morning, give the oats a good stir to incorporate any settled ingredients. Serve chilled directly from the fridge or allow them to sit at room temperature for a few minutes if preferred.
- Add Toppings (Optional): Before serving, you can add additional toppings such as sliced bananas, more berries, a dollop of yogurt, or a sprinkle of granola for added crunch.
Extra Tips:
For a creamier consistency, consider adding an extra splash of milk in the morning before serving. If you prefer a sweeter taste, adjust the amount of honey or maple syrup according to your liking.
Overnight oats can be stored in the refrigerator for up to five days, making them an excellent option for meal prep. Feel free to experiment with different fruits, nuts, or spices to create variations of this recipe.
For those with dietary restrictions, substitute ingredients as needed, such as using gluten-free oats or a plant-based yogurt.
Veggie Omelette Wrap
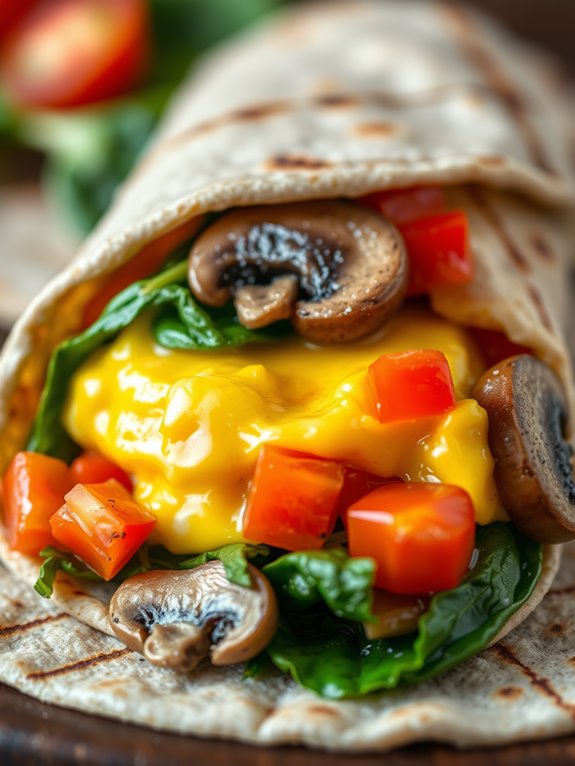
Veggie Omelette Wrap is a nutritious and delicious breakfast option that brings together the goodness of fresh vegetables and the protein power of eggs. This delightful dish is perfect for those who want a quick yet fulfilling morning meal that’s both satisfying and healthy.
The combination of vibrant vegetables and fluffy eggs wrapped in a soft tortilla makes it an ideal choice for a breakfast on-the-go or a leisurely meal at home. Packed with vitamins and nutrients, the Veggie Omelette Wrap is customizable to suit your taste preferences, offering endless opportunities to incorporate your favorite vegetables.
This easy-to-make recipe guarantees you start your day with a boost of energy and the essential nutrients your body needs. Whether you’re serving it to your family or preparing it for yourself, this recipe caters to 4-6 people, making it a great choice for a family breakfast or a weekend brunch.
Ingredients:
- 8 large eggs
- 1/4 cup milk
- Salt and pepper to taste
- 1 cup spinach, chopped
- 1 red bell pepper, diced
- 1/2 cup mushrooms, sliced
- 1/2 cup cherry tomatoes, halved
- 1/2 cup shredded cheese (cheddar or your choice)
- 1 tablespoon olive oil
- 4-6 large whole wheat tortillas
- Optional: salsa, avocado slices, or hot sauce for serving
Cooking Instructions:
1. Prepare the Veggies: Start by washing and chopping all the vegetables. Confirm the spinach is roughly chopped, the bell pepper is diced, the mushrooms are sliced, and the cherry tomatoes are halved.
2. Whisk the Eggs: In a large bowl, crack the eggs and add the milk, salt, and pepper. Whisk the mixture until it’s well combined and slightly frothy.
3. Cook the Vegetables: Heat olive oil in a large non-stick skillet over medium heat. Add the bell pepper and mushrooms to the skillet and sauté for about 3-4 minutes until they’re slightly tender.
Then, add the spinach and cherry tomatoes, cooking for another 2 minutes until the spinach is wilted.
4. Add the Eggs: Pour the whisked eggs into the skillet with the veggies. Gently stir the mixture to guarantee even cooking and distribution of vegetables throughout the omelet.
Continue to cook over medium heat until the eggs are just set, which should take about 5-7 minutes.
5. Add the Cheese: Sprinkle the shredded cheese evenly over the top of the omelet. Allow it to melt over the heat for about 1-2 minutes.
6. Wrap it Up: Warm the tortillas in a microwave or on a dry skillet. Spoon the omelet mixture onto each tortilla, then fold the sides and roll it up tightly to create a wrap.
7. Serve: Serve the Veggie Omelette Wraps immediately. For added flavor, serve with optional salsa, avocado slices, or a dash of hot sauce.
Extra Tips:
For a fluffier omelet, you can separate the egg whites and yolks, whisk the whites until they form soft peaks, and then gently fold them into the yolks before cooking.
If you prefer your wraps with a bit of a kick, consider adding jalapeños or a sprinkle of red pepper flakes to the vegetable mix. Additionally, you can prepare the vegetables the night before to save time in the morning.
Berry Yogurt Parfait
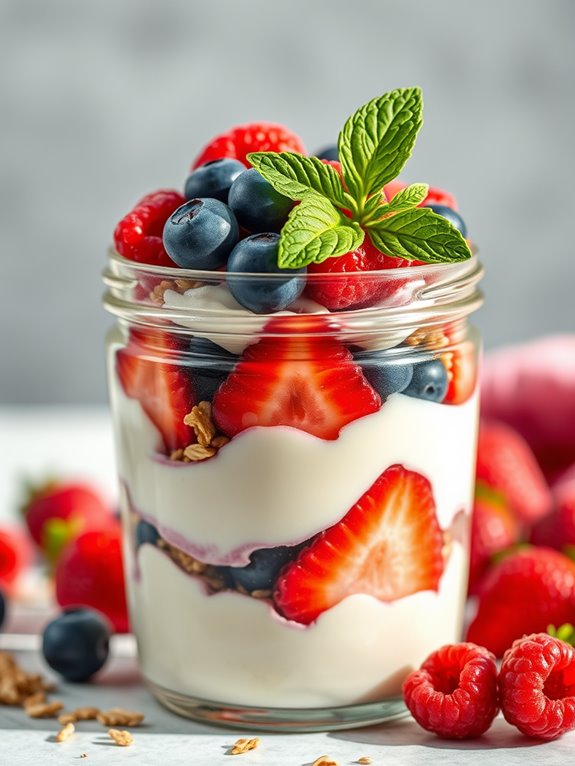
Berry Yogurt Parfait is a delightful and nutritious breakfast option that combines the freshness of berries with the creaminess of yogurt, layered with crunchy granola. This parfait not only pleases the palate with its combination of textures and flavors but also provides a healthy start to your day, packed with antioxidants, probiotics, and fiber.
Perfect for busy mornings or as a light snack, Berry Yogurt Parfait can be made quickly and easily, making it a favorite among health-conscious individuals.
For this recipe, we’ll use a mix of strawberries, blueberries, and raspberries, which provide a vibrant color palette and a burst of flavor. Greek yogurt will add a rich and tangy creaminess, while granola will offer a satisfying crunch. This recipe is designed to serve 4-6 people, making it an ideal choice for a family breakfast or a brunch gathering with friends.
Let’s explore the ingredients and get started on creating this beautiful and delicious Berry Yogurt Parfait.
Ingredients for 4-6 servings:
- 3 cups of Greek yogurt
- 2 cups of mixed berries (strawberries, blueberries, raspberries)
- 1 1/2 cups of granola
- 2 tablespoons of honey
- 1 teaspoon of vanilla extract
- Fresh mint leaves for garnish (optional)
Cooking Instructions:
- Prepare the Berries: Start by washing the berries thoroughly under cold water. Pat them dry with a clean kitchen towel or paper towels. If using strawberries, hull them and cut them into quarters.
- Mix the Yogurt: In a medium-sized bowl, combine the Greek yogurt with vanilla extract and honey. Stir well until the mixture is smooth and the honey is fully incorporated.
- Layer the Parfait: Take 4-6 serving glasses or jars. Begin by adding a generous spoonful of the yogurt mixture to the bottom of each glass.
- Add the Berries: Next, add a layer of mixed berries over the yogurt. Be sure to distribute the berries evenly among the glasses for a balanced parfait.
- Add the Granola: Sprinkle a layer of granola over the berries. This will add a delightful crunch to your parfait.
- Repeat the Layers: Repeat the layering process – yogurt, berries, then granola – until the glasses are filled, ending with a layer of berries on top.
- Garnish and Serve: Garnish each parfait with a few fresh mint leaves for a burst of color and a hint of freshness. Serve immediately or refrigerate for up to 2 hours before serving.
Extra Tips:
To enhance the flavor of your Berry Yogurt Parfait, consider using seasonal and locally-sourced berries for the best taste and texture.
If you’re preparing the parfaits in advance, layer the granola just before serving to maintain its crunchiness. Additionally, you can customize the parfait by using flavored yogurt or adding nuts, seeds, or other fruits to suit your taste preferences.
For a vegan version, substitute Greek yogurt with coconut or almond yogurt, and use maple syrup instead of honey.
Avocado Toast Twist
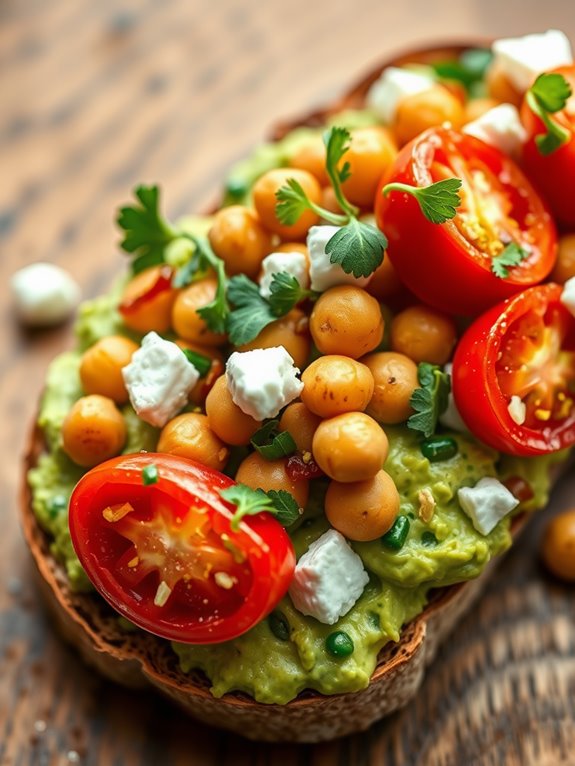
Avocado Toast Twist is a delightful and nutritious spin on the classic avocado toast, perfect for a wholesome breakfast or brunch. This recipe combines the creamy richness of ripe avocados with the zesty freshness of lime and the savory crunch of roasted chickpeas.
With a hint of spice and a touch of sweetness, each bite is a harmonious blend of contrasting flavors and textures. Whether you’re a long-time fan of avocado toast or new to this trendy dish, the Avocado Toast Twist is guaranteed to impress and satisfy your taste buds.
This dish isn’t only delicious but also packed with nutrients. Avocados are a great source of healthy fats and fiber, while chickpeas add protein and additional fiber. The whole grain bread provides complex carbohydrates, keeping you energized throughout the morning.
This recipe serves 4-6 people, making it ideal for a family breakfast or a small gathering with friends. It’s quick to prepare and can be customized to suit your personal taste preferences.
Ingredients:
- 4-6 slices of whole grain or sourdough bread
- 2 ripe avocados
- 1 tablespoon lime juice
- Salt and pepper to taste
- 1 can (15 oz) chickpeas, drained and rinsed
- 1 tablespoon olive oil
- 1 teaspoon smoked paprika
- 1/2 teaspoon garlic powder
- 1/4 teaspoon cayenne pepper (optional)
- 1/4 cup crumbled feta cheese
- 2 tablespoons chopped fresh cilantro
- 1/2 cup cherry tomatoes, halved
- Optional toppings: red pepper flakes, lemon zest, microgreens
Instructions:
- Prepare the Chickpeas: Preheat your oven to 400°F (200°C). Spread the drained and rinsed chickpeas on a baking sheet lined with parchment paper. Drizzle with olive oil and sprinkle with smoked paprika, garlic powder, cayenne pepper, salt, and pepper. Toss to coat evenly. Roast in the oven for 20-25 minutes, until they’re golden and crispy, stirring halfway through.
- Toast the Bread: While the chickpeas are roasting, toast the slices of bread to your desired level of crispiness using a toaster or an oven grill.
- Mash the Avocados: In a medium bowl, add the avocados and lime juice. Mash them together with a fork until you reach your preferred consistency—smooth or slightly chunky. Season with salt and pepper to taste.
- Assemble the Toast: Once the bread is toasted, spread a generous layer of mashed avocado on each slice. Top with roasted chickpeas, crumbled feta, cherry tomatoes, and chopped cilantro.
- Add Optional Toppings: If desired, sprinkle with red pepper flakes for some heat, lemon zest for a citrusy touch, or microgreens for added freshness and color.
Extra Tips:
To guarantee your Avocado Toast Twist is at its best, choose ripe avocados that yield slightly to gentle pressure. If you prefer your chickpeas extra crispy, let them cool on the baking sheet after roasting.
This dish can be made gluten-free by using gluten-free bread. For a vegan option, simply omit the feta cheese or replace it with a plant-based alternative. Feel free to experiment with different toppings, like toasted sesame seeds or a drizzle of balsamic glaze, to create your unique version of this delicious breakfast treat.
Banana Pancake Bites
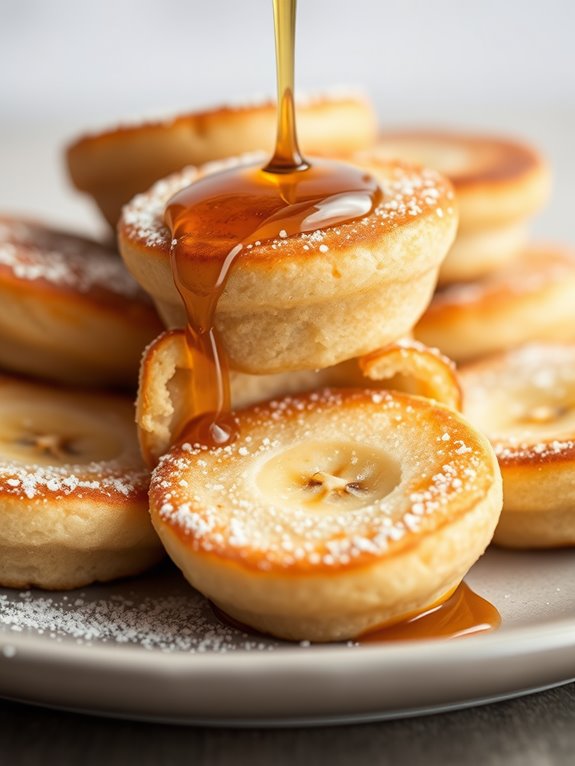
Banana Pancake Bites are a delightful twist on traditional pancakes, offering a bite-sized treat perfect for breakfast or brunch. These mini pancakes aren’t only easy to make but also packed with the natural sweetness of ripe bananas, making them a healthier option for those who crave something sweet in the morning.
Ideal for families or gatherings, this dish guarantees that everyone gets a serving of fluffy, tasty pancakes without the hassle of flipping large pancakes on the griddle.
The recipe for Banana Pancake Bites is straightforward and quick, making it an excellent choice for busy mornings. By combining simple ingredients with a few ripe bananas, you can create a dish that pleases both kids and adults alike.
These bites are versatile and can be served plain, dusted with powdered sugar, or drizzled with your favorite syrup. Whether you’re making them for a leisurely weekend brunch or a quick weekday breakfast, Banana Pancake Bites are sure to become a household favorite.
Ingredients for 4-6 People:
- 2 ripe bananas
- 2 cups all-purpose flour
- 2 tablespoons baking powder
- 1/4 teaspoon salt
- 2 tablespoons sugar
- 1 1/2 cups milk
- 2 large eggs
- 1 teaspoon vanilla extract
- 2 tablespoons unsalted butter, melted
- Butter or oil for greasing the pan
Cooking Instructions:
- Prepare the Bananas: Begin by mashing the ripe bananas in a large mixing bowl until smooth. It’s okay if there are a few small lumps as they’ll add texture to the pancake bites.
- Mix Dry Ingredients: In a separate bowl, combine the all-purpose flour, baking powder, salt, and sugar. Stir these dry ingredients together to ascertain that the baking powder is evenly distributed.
- Combine Wet Ingredients: In the bowl with the mashed bananas, add the milk, eggs, vanilla extract, and melted butter. Whisk these together until they’re well combined.
- Create the Batter: Gradually add the dry ingredients to the wet ingredients, stirring gently until just combined. Be careful not to over-mix the batter as this can make the pancake bites tough.
- Preheat the Pan: Heat a non-stick skillet or griddle over medium heat. Lightly grease it with butter or oil to prevent the pancake bites from sticking.
- Cook the Pancake Bites: Using a tablespoon or small cookie scoop, drop small amounts of batter onto the skillet. Cook for 2-3 minutes or until bubbles form on the surface of the pancake bites and the edges look set. Flip them over and cook for another 1-2 minutes, or until golden brown.
- Serve: Once cooked, remove the pancake bites from the skillet and serve warm. They can be enjoyed plain, with a sprinkle of powdered sugar, or with a drizzle of maple syrup.
Extra Tips:
When making Banana Pancake Bites, verify that your bananas are thoroughly ripe as this will enhance the natural sweetness and flavor of the bites.
If you prefer a dairy-free version, you can substitute the milk with almond or oat milk and use coconut oil instead of butter. Additionally, consider adding a handful of chocolate chips or chopped nuts to the batter for an extra special touch.
For a crispier exterior, make sure the skillet is well-heated before adding the batter. Enjoy your delicious and healthy breakfast treat!
Smoothie Bowl Bliss
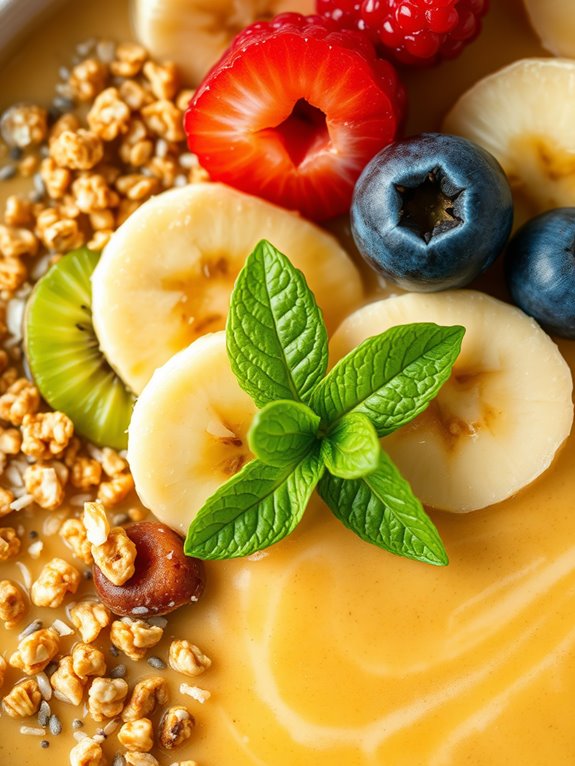
Start your day on a blissful note with this Tropical Smoothie Bowl. This healthy breakfast option isn’t only delicious but also packed with a variety of nutrients that will keep you energized throughout the morning. The combination of tropical fruits, creamy yogurt, and a sprinkle of crunchy toppings makes it a satisfying and indulgent treat.
Perfect for those who crave a quick and invigorating breakfast, this smoothie bowl will become your go-to morning ritual. The beauty of a smoothie bowl lies in its versatility. You can customize it to suit your taste preferences and dietary needs.
In this Tropical Smoothie Bowl recipe, we’ve opted for a base that includes bananas, mangoes, and pineapple—fruits that provide natural sweetness and a wealth of vitamins and minerals. Topped with a variety of seeds, nuts, and fresh fruit, this dish isn’t only a feast for the palate but also for the eyes. Gather your ingredients and get ready to plunge into a bowl full of tropical bliss!
Ingredients (Serves 4-6):
- 2 ripe bananas
- 2 cups frozen mango chunks
- 2 cups frozen pineapple chunks
- 1 cup Greek yogurt
- 1 cup coconut milk
- 1 tablespoon honey (optional)
- 1/2 cup granola
- 1/4 cup chia seeds
- 1/4 cup toasted coconut flakes
- 1/4 cup sliced almonds
- Fresh fruit for topping (such as kiwi, berries, or banana slices)
- Mint leaves for garnish (optional)
Cooking Instructions:
- Prepare the Smoothie Base: In a blender, combine the ripe bananas, frozen mango chunks, frozen pineapple chunks, Greek yogurt, and coconut milk. Blend on high speed until the mixture is smooth and creamy. If you prefer a sweeter taste, add a tablespoon of honey and blend again briefly.
- Adjust Consistency: Check the consistency of the smoothie. If it’s too thick, add a little more coconut milk and blend until desired consistency is reached. If it’s too thin, you can add a few more frozen mango or pineapple chunks to thicken it up.
- Pour and Spread: Divide the smoothie evenly into bowls. Use the back of a spoon to spread it evenly and create a smooth surface across the top.
- Add Toppings: Decorate the top of each smoothie bowl with granola, chia seeds, toasted coconut flakes, and sliced almonds. Arrange fresh fruit slices artfully on top, such as kiwi, berries, or banana slices. Finish with a few mint leaves for an extra touch of color and flavor, if desired.
- Serve Immediately: Enjoy your Tropical Smoothie Bowl immediately while the ingredients are fresh and the textures are distinct.
Extra Tips:
For the ultimate smoothie bowl experience, make sure your fruits are well frozen as this helps in achieving the right thick and creamy consistency.
Feel free to experiment with different fruit combinations or include superfoods like spirulina or acai powder for added nutritional benefits. Always adjust the sweetness to your liking by adding more or less honey or using a sweetened yogurt.
Finally, for those who prefer a dairy-free option, you can substitute Greek yogurt with coconut yogurt. Enjoy your smoothie bowl blissfully and let your creativity shine through your toppings!
Nut Butter Banana Sandwich
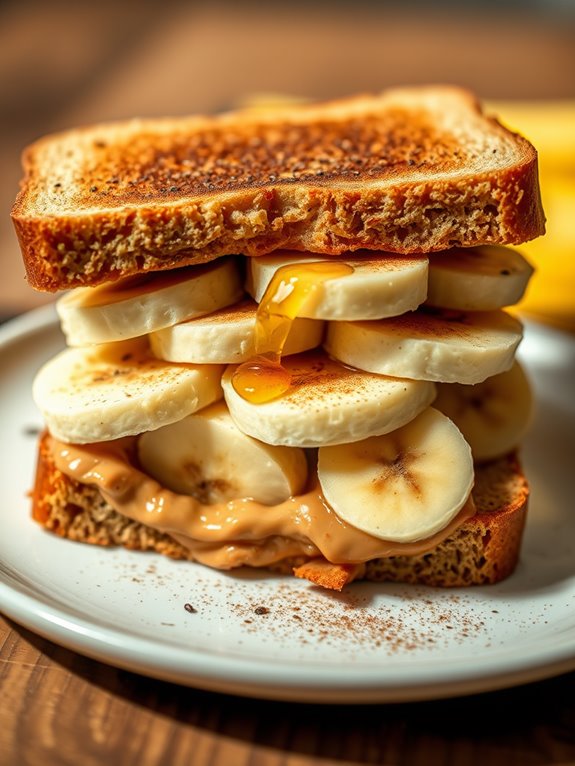
Nut Butter Banana Sandwiches are a delicious and nutritious way to start your day, providing a perfect balance of proteins, healthy fats, and carbohydrates. These sandwiches aren’t only quick and easy to prepare but also versatile enough to cater to various dietary preferences.
Whether you’re in a hurry or looking to enjoy a leisurely breakfast, this recipe offers a satisfying option that keeps you full and energized throughout the morning. The combination of creamy nut butter, sweet bananas, and whole-grain bread creates a delightful contrast of textures and flavors that even picky eaters will love.
Ideal for a family breakfast or a brunch gathering, Nut Butter Banana Sandwiches can be customized with different types of nut butter like almond, peanut, or cashew, and can be enhanced with toppings such as honey, chia seeds, or cinnamon. This recipe makes enough for 4-6 servings, ensuring everyone gets their fill of this wholesome breakfast treat.
Not only is it packed with nutrients, but it also requires minimal cooking skills, making it accessible for cooks of all levels.
Ingredients for 4-6 servings:
- 8-12 slices of whole-grain bread
- 1 cup of nut butter (peanut, almond, or cashew)
- 4-6 bananas
- Optional: honey, chia seeds, cinnamon, or sliced strawberries
Cooking Instructions:
- Prepare the Bread: Toast the slices of whole-grain bread to your desired level of crispness. You can use a toaster or an oven set to a low broil setting. This step provides a firm base for your sandwich and enhances the texture.
- Spread the Nut Butter: Once the bread is toasted, use a butter knife to evenly spread about 2 tablespoons of your chosen nut butter on each slice. Make sure the nut butter is at room temperature for easier spreading.
- Slice the Bananas: Peel 4-6 bananas and cut them into thin, even slices. Try to keep the slices uniform so they layer neatly on the bread.
- Assemble the Sandwich: Place a generous layer of banana slices over the nut butter on half of the toasted bread slices. If desired, drizzle a small amount of honey over the bananas or sprinkle with cinnamon or chia seeds for added flavor and nutrition.
- Top and Serve: Complete the sandwich by placing another slice of bread on top of the banana layer. Cut each sandwich diagonally for easier handling and serve immediately for the best taste and texture.
Extra Tips:
To enhance the flavor and nutritional value of your Nut Butter Banana Sandwich, consider experimenting with different toppings. For instance, adding strawberries can provide an extra burst of sweetness and color.
If you prefer a bit of crunch, try adding a sprinkle of chia seeds or a drizzle of honey for a touch of natural sweetness. Additionally, if you’re preparing these sandwiches in advance, it’s best to keep the bananas and nut butter separate from the bread until serving time to prevent sogginess.
This recipe is highly adaptable, so feel free to adjust the ingredients based on your taste preferences and dietary needs.
Breakfast Quinoa Bowl
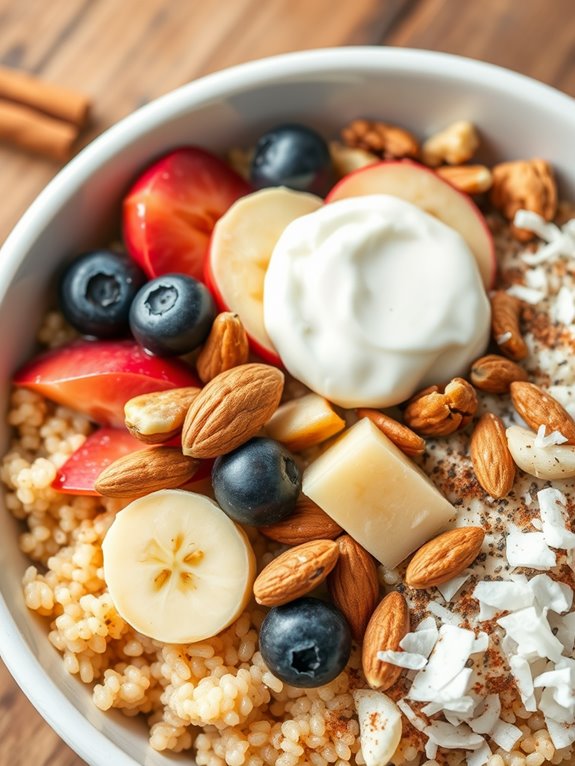
Start your day with a nutritious and delicious Breakfast Quinoa Bowl, a delightful blend of quinoa, fresh fruits, nuts, and a hint of sweetness that’s bound to energize you for the morning ahead.
This recipe combines the superfood properties of quinoa, packed with protein and essential amino acids, with the natural sweetness and vitamins from a variety of fruits. Not only is this breakfast bowl easy to prepare, but it’s also highly customizable to suit your taste preferences and dietary needs.
The Breakfast Quinoa Bowl is perfect for serving 4-6 people, making it an ideal choice for a family breakfast or a lively brunch gathering. You can serve it warm or cold, depending on your preference, and it’s easily adaptable to seasonal fruits and available ingredients.
The combination of textures and flavors – from the nutty quinoa and crunchy nuts to the juicy fruits – promises a satisfying and wholesome meal that keeps you full and nourished.
Ingredients:
- 2 cups quinoa, rinsed
- 4 cups water
- 1/4 teaspoon salt
- 1/4 cup honey or maple syrup
- 1 teaspoon vanilla extract
- 2 cups mixed fresh fruits (such as berries, apples, bananas)
- 1/2 cup nuts or seeds (such as almonds, walnuts, or chia seeds)
- 1/2 cup yogurt (optional)
- 1/4 cup unsweetened shredded coconut (optional)
- 1 teaspoon cinnamon (optional)
Instructions:
- Prepare Quinoa: In a medium-sized saucepan, combine the rinsed quinoa, water, and salt. Bring the mixture to a boil over medium-high heat. Once boiling, reduce the heat to low, cover the saucepan, and let it simmer for about 15 minutes, or until the water is absorbed and the quinoa is fluffy.
- Sweeten Quinoa: Once the quinoa is cooked, remove it from heat and let it stand, covered, for 5 minutes. Afterward, fluff the quinoa with a fork and stir in the honey or maple syrup, and vanilla extract. Mix well to ascertain the quinoa is evenly sweetened.
- Prepare Toppings: While the quinoa is resting, wash and chop the fruits into bite-sized pieces. If using nuts or seeds, consider toasting them lightly in a dry skillet over medium heat for 3-5 minutes to enhance their flavor.
- Assemble the Bowl: Divide the sweetened quinoa among serving bowls. Top each bowl with a generous portion of mixed fruits, nuts, or seeds. For additional flavor, add a dollop of yogurt, a sprinkle of shredded coconut, and a dash of cinnamon if desired.
- Serve: Serve the Breakfast Quinoa Bowl warm or allow it to cool and refrigerate for a revitalizing cold breakfast option.
Extra Tips: To save time in the morning, consider preparing the quinoa the night before and storing it in the refrigerator. This will allow for a quicker assembly of your breakfast bowl.
Feel free to experiment with different fruit combinations and toppings to keep the recipe exciting and varied. If you prefer a creamier texture, stir in a bit of milk or a dairy-free alternative when sweetening the quinoa.
Finally, adjust the sweetness to your liking, adding more or less honey or maple syrup as needed.
Spinach Feta Muffins
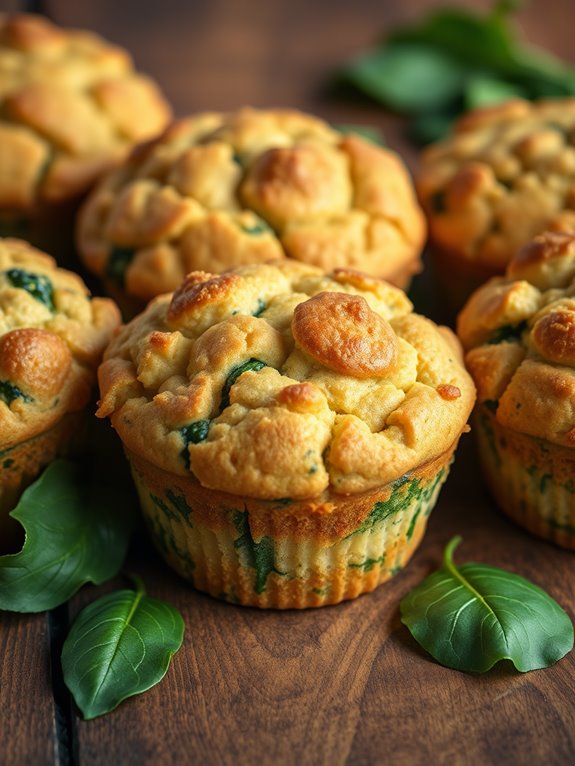
Start your day with a savory twist by baking a batch of Spinach Feta Muffins. These muffins are a delightful combination of earthy spinach and tangy feta cheese, offering a healthy, satisfying breakfast option. Perfect for those who are looking to incorporate more greens into their diet without compromising on flavor, these muffins are moist, flavorful, and incredibly easy to make.
Whether you’re on the go or enjoying a leisurely breakfast at home, Spinach Feta Muffins are a delicious way to fuel your morning. These muffins aren’t only packed with nutrients but are also versatile enough to be enjoyed as a snack or a side dish. With a light, fluffy texture and a rich taste, they pair well with a hot cup of coffee or tea.
Plus, they can be made ahead of time and stored in the refrigerator or freezer for a quick, convenient meal option. This recipe makes enough for 4-6 people, guaranteeing everyone gets to enjoy this tasty breakfast treat.
Ingredients:
- 2 cups all-purpose flour
- 1 tablespoon baking powder
- 1/2 teaspoon baking soda
- 1/2 teaspoon salt
- 1/4 teaspoon black pepper
- 2 large eggs
- 1 cup plain Greek yogurt
- 1/4 cup olive oil
- 1 cup crumbled feta cheese
- 1 cup fresh spinach, chopped
- 1/4 cup milk
Cooking Instructions:
- Preheat the Oven: Start by preheating your oven to 375°F (190°C). This guarantees that your muffins will bake evenly and rise properly.
- Prepare the Muffin Tin: Line a muffin tin with paper liners or lightly grease each cup with a non-stick cooking spray to prevent the muffins from sticking.
- Mix Dry Ingredients: In a large bowl, whisk together the flour, baking powder, baking soda, salt, and black pepper. This will ensure that the leavening agents are evenly distributed throughout.
- Create the Wet Mixture: In a separate bowl, beat the eggs lightly. Add in the Greek yogurt, olive oil, and milk, mixing until well combined.
- Combine the Mixtures: Gradually add the wet ingredients to the dry ingredients, stirring gently until just combined. Be careful not to overmix, as this can make the muffins dense.
- Incorporate Spinach and Feta: Fold in the chopped spinach and crumbled feta cheese until they’re evenly distributed throughout the batter.
- Fill the Muffin Cups: Divide the batter evenly among the prepared muffin cups, filling each about 3/4 full to allow space for rising.
- Bake: Place the muffin tin in the preheated oven and bake for 18-22 minutes, or until a toothpick inserted into the center of a muffin comes out clean.
- Cool and Serve: Remove the muffins from the oven and let them cool in the tin for about 5 minutes before transferring them to a wire rack. Serve warm or at room temperature.
Extra Tips:
To enhance the flavor, try adding a pinch of nutmeg or a tablespoon of fresh herbs such as dill or parsley to the batter. If you prefer a bit more crunch, consider adding a handful of chopped nuts or seeds.
For a lighter version, you can substitute whole wheat flour for half of the all-purpose flour. When storing, place the muffins in an airtight container to maintain their freshness, and reheat them in the microwave for about 15-20 seconds for a quick breakfast on busy mornings.
Apple Cinnamon Waffles
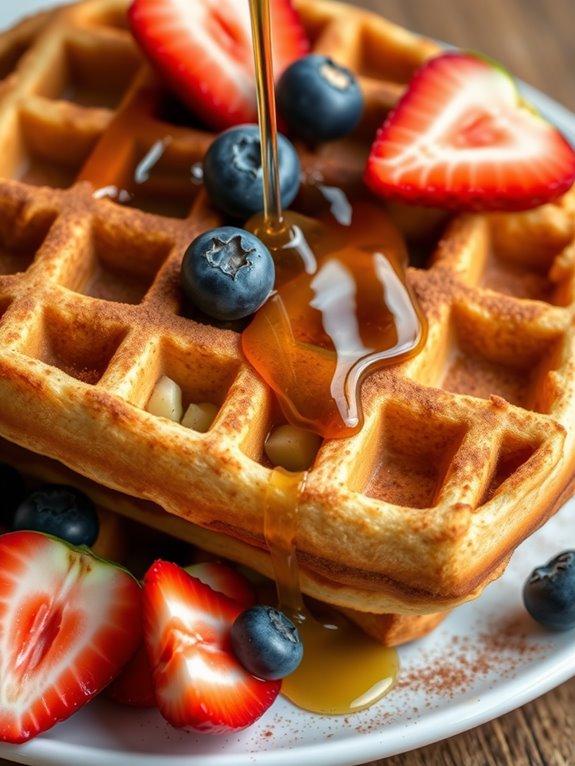
Apple Cinnamon Waffles are a delightful twist on the classic breakfast staple, infusing the comforting flavors of apple and cinnamon into a fluffy, golden-brown waffle. Ideal for a cozy morning meal, these waffles offer a warm and inviting start to your day.
With their crisp outside and tender inside, they’re sure to please both kids and adults alike. The combination of sweet apple bits with a hint of spice from the cinnamon makes these waffles a perfect pairing with maple syrup, fresh fruits, or even a dollop of vanilla yogurt.
Making Apple Cinnamon Waffles isn’t only a treat for the taste buds but also an easy and fun cooking experience. This recipe is designed for a serving size of 4-6 people, making it perfect for a family breakfast or a weekend brunch with friends.
The ingredients are simple, and the preparation is straightforward, allowing you to focus on enjoying the wonderful aroma that fills your kitchen as the waffles cook. Immerse yourself in this delectable recipe and start your day with a smile!
Ingredients:
- 2 cups all-purpose flour
- 2 tablespoons granulated sugar
- 1 tablespoon baking powder
- 1/2 teaspoon salt
- 1 teaspoon ground cinnamon
- 2 large eggs
- 1 3/4 cups milk
- 1/2 cup unsalted butter, melted
- 1 teaspoon vanilla extract
- 1 cup peeled and finely chopped apples (e.g., Granny Smith or Honeycrisp)
Instructions:
- Prepare the Dry Ingredients: In a large mixing bowl, whisk together the flour, sugar, baking powder, salt, and ground cinnamon. Confirm the mixture is well combined to evenly distribute the baking powder and cinnamon.
- Mix the Wet Ingredients: In another bowl, beat the eggs and then add the milk, melted butter, and vanilla extract. Stir until the ingredients are fully blended and smooth.
- Combine Dry and Wet Mixtures: Gradually pour the wet ingredients into the dry mixture. Stir gently until just combined, being careful not to overmix the batter. A few lumps are fine and will result in fluffy waffles.
- Fold in the Apples: Gently fold the chopped apples into the batter, ensuring they’re evenly distributed throughout.
- Preheat the Waffle Iron: Preheat your waffle iron according to the manufacturer’s instructions. Lightly grease with cooking spray or a brush of oil to prevent sticking.
- Cook the Waffles: Pour the batter into the preheated waffle iron, using about 1/2 to 3/4 cup of batter per waffle (depending on your waffle iron size). Close the lid and cook until the waffles are golden brown and crisp, usually about 4-5 minutes.
- Serve and Enjoy: Carefully remove the waffles from the iron and serve immediately with your choice of toppings such as maple syrup, fresh fruit, or yogurt.
Extra Tips:
To achieve the best texture, make sure not to overmix the batter. Overmixing can make the waffles dense rather than light and fluffy.
It’s also important to preheat your waffle iron properly; a sufficiently hot iron will give the waffles a crisp exterior. If you’re preparing these waffles ahead of time, keep them warm in an oven set to low heat (about 200°F) until ready to serve.
You can also freeze leftover waffles and reheat them in a toaster for a quick breakfast option.
Chia Seed Pudding
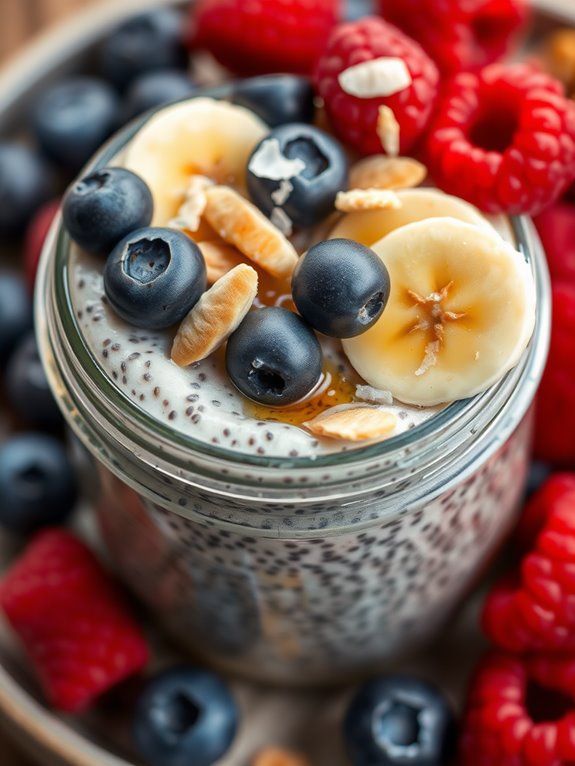
Chia Seed Pudding is a versatile and nutritious breakfast option that’s both easy to prepare and delicious. This dish is perfect for those who are on-the-go in the morning but still want to enjoy a healthy meal. Chia seeds are packed with fiber, protein, omega-3 fatty acids, and various essential minerals, making them a superfood that promises to keep you full and energized throughout the morning.
The beauty of chia seed pudding lies in its simplicity and adaptability; you can customize it with your favorite flavors and toppings like fresh fruits, nuts, or even a drizzle of honey.
Making chia seed pudding is straightforward and requires just a few ingredients. The seeds absorb liquid and form a gel-like consistency, which resembles a creamy pudding. It’s best to prepare the pudding the night before and let it sit in the refrigerator overnight, allowing the seeds plenty of time to absorb the liquid and swell. This also means you’ll wake up to a ready-made breakfast that requires no additional morning prep time.
The following recipe is designed to serve 4-6 people, making it ideal for family breakfasts or meal-prepping for the week ahead.
Ingredients for 4-6 servings:
- 1 cup chia seeds
- 4 cups almond milk (or any preferred milk)
- 1 teaspoon vanilla extract
- 1/4 cup maple syrup or honey
- A pinch of salt
- Optional toppings: fresh berries, sliced bananas, nuts, coconut flakes, or granola
Cooking Instructions:
- Combine Ingredients: In a large mixing bowl, add the chia seeds, almond milk, vanilla extract, maple syrup (or honey), and a pinch of salt. Stir everything together until well combined.
- Let it Rest: Allow the mixture to sit for about 10 minutes, then stir again to prevent the chia seeds from clumping together. This step is essential for ensuring an even texture.
- Refrigerate Overnight: Cover the bowl or divide the mixture into individual serving jars, and place them in the refrigerator. Let the chia seed pudding sit overnight or for at least 4 hours to thicken.
- Serve and Enjoy: When ready to serve, give the pudding a good stir and add your choice of toppings. You can mix in fresh berries, sliced bananas, nuts, coconut flakes, or granola for added flavor and texture.
Extra Tips:
For a creamier texture, consider using canned coconut milk instead of almond milk. You can also experiment with different flavors by adding cocoa powder for a chocolate version or cinnamon for a spiced touch.
Adjust the sweetness to your liking by varying the amount of maple syrup or honey. If you prefer a smoother pudding, blend the mixture before refrigerating. Remember that chia seed pudding can be stored in the refrigerator for up to 5 days, making it a practical option for meal prep.
Cottage Cheese Fruit Bowl
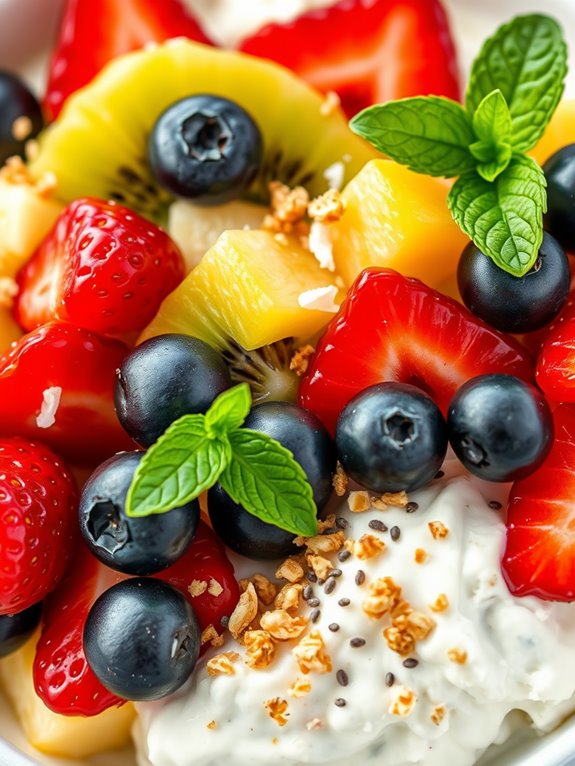
Cottage Cheese Fruit Bowl is a rejuvenating and nutritious breakfast option that combines the creamy texture of cottage cheese with the natural sweetness of fresh fruits. This delightful dish isn’t only easy to prepare but also provides a balanced meal packed with protein, vitamins, and minerals.
Perfect for starting your day on a healthy note, the Cottage Cheese Fruit Bowl can be customized with your favorite fruits to suit your taste preferences. Whether you’re in a rush or have a leisurely morning, this quick-to-assemble breakfast will fuel your day with energy and keep you satisfied until your next meal.
The Cottage Cheese Fruit Bowl is an ideal choice for those looking to maintain a healthy lifestyle while enjoying a delicious and flavorful start to their day. With a serving size of 4-6 people, it’s perfect for sharing with family or friends over a relaxed breakfast or brunch.
Ingredients for Serving Size of 4-6 People:
- 3 cups of cottage cheese
- 1 cup of strawberries, hulled and sliced
- 1 cup of blueberries
- 1 cup of kiwi, peeled and diced
- 1 cup of pineapple, diced
- 1/4 cup of honey or maple syrup
- 1/4 cup of granola
- 1/4 cup of shredded coconut (optional)
- 2 tablespoons of chia seeds (optional)
- Fresh mint leaves for garnish (optional)
Cooking Instructions:
- Prepare the Fruits: Begin by washing all the fresh fruits thoroughly. Hull and slice the strawberries, peel and dice the kiwi, and dice the pineapple into small, bite-sized pieces. Set aside the fruits for later use.
- Mix the Cottage Cheese: In a large mixing bowl, add the cottage cheese. If you prefer a slightly sweeter base, mix in the honey or maple syrup and stir well until fully combined.
- Assemble the Fruit Bowl: In a serving bowl, evenly distribute the cottage cheese mixture as the base. Arrange the prepared fruits – strawberries, blueberries, kiwi, and pineapple – on top of the cottage cheese. You can either layer the fruits or mix them together for a more colorful presentation.
- Add Toppings: Sprinkle granola over the fruit and cottage cheese mixture to add a crunchy texture. If desired, add shredded coconut and chia seeds for extra flavor and nutritional benefits.
- Garnish and Serve: Finish by garnishing the Cottage Cheese Fruit Bowl with fresh mint leaves for a pop of color and a hint of freshness. Serve immediately and enjoy your healthy breakfast!
Extra Tips:
For a creamier texture, consider using whipped cottage cheese, which blends smoothly with the fruits. If you’re preparing the Cottage Cheese Fruit Bowl in advance, keep the fruits and cottage cheese separate until just before serving to prevent the fruits from making the cheese soggy.
Experiment with different fruits according to the season, such as mangoes or peaches, to keep the recipe exciting and varied. Adjust the sweetness to your liking by using more or less honey or maple syrup, or substitute with your preferred sweetener.
Egg and Cheese Muffins

Egg and Cheese Muffins are a delightful and nutritious breakfast option that will keep you energized throughout the morning.
These muffins are a perfect combination of protein and cheesy goodness, making them both satisfying and delicious. They’re easy to prepare and can be made ahead of time, making them a great choice for busy mornings or as a grab-and-go breakfast.
These muffins are incredibly versatile, allowing you to add your favorite vegetables, meats, or spices to customize them to your taste. The base recipe is simple but provides a canvas for endless variations.
With just a few ingredients and minimal prep time, you can enjoy a homemade breakfast that’s both healthy and convenient.
Ingredients (serving size: 4-6 people):
- 8 large eggs
- ½ cup milk
- 1 cup shredded cheddar cheese
- ½ cup diced bell peppers
- ½ cup chopped spinach
- ¼ cup diced onions
- ¼ cup cooked and crumbled bacon or sausage (optional)
- Salt and pepper to taste
- Non-stick cooking spray
Cooking Instructions:
- Preheat the Oven: Start by preheating your oven to 350°F (175°C). This guarantees that your muffins will cook evenly once they’re placed inside.
- Prepare the Muffin Tin: Spray a 12-cup muffin tin generously with non-stick cooking spray. This will prevent the egg muffins from sticking to the pan, making them easier to remove after baking.
- Whisk the Eggs: In a large mixing bowl, crack the eggs and add the milk. Whisk the mixture thoroughly until it’s well combined, ensuring a smooth consistency.
- Add Ingredients: Stir in the shredded cheddar cheese, diced bell peppers, chopped spinach, diced onions, and bacon or sausage if using. Season the mixture with salt and pepper to taste.
- Fill the Muffin Cups: Pour the egg mixture evenly into the prepared muffin cups, filling each about ¾ full. This allows room for the muffins to expand as they bake.
- Bake the Muffins: Place the muffin tin in the preheated oven and bake for 20-25 minutes, or until the egg muffins are fully set and a toothpick inserted into the center comes out clean.
- Cool and Serve: Once baked, remove the muffins from the oven and let them cool in the pan for a few minutes. Gently run a knife around the edges of each muffin to release them from the tin. Serve warm or store for later.
Extra Tips:
For added flavor, consider incorporating herbs such as parsley, chives, or basil into the egg mixture.
These muffins can be stored in the refrigerator for up to five days, making them perfect for meal prep. Simply reheat them in the microwave for a quick breakfast.
If you wish to freeze them, allow the muffins to cool completely, then place them in an airtight container or freezer bag. They can be reheated directly from the freezer in the microwave or oven.
Follow us on Social Media!
I’m Nina, and I’m very passionate about spirituality. Exploring the depths of the soul and connecting with the divine has always been my source of inspiration. Join me on a journey of self-discovery and inner peace through my writing.

